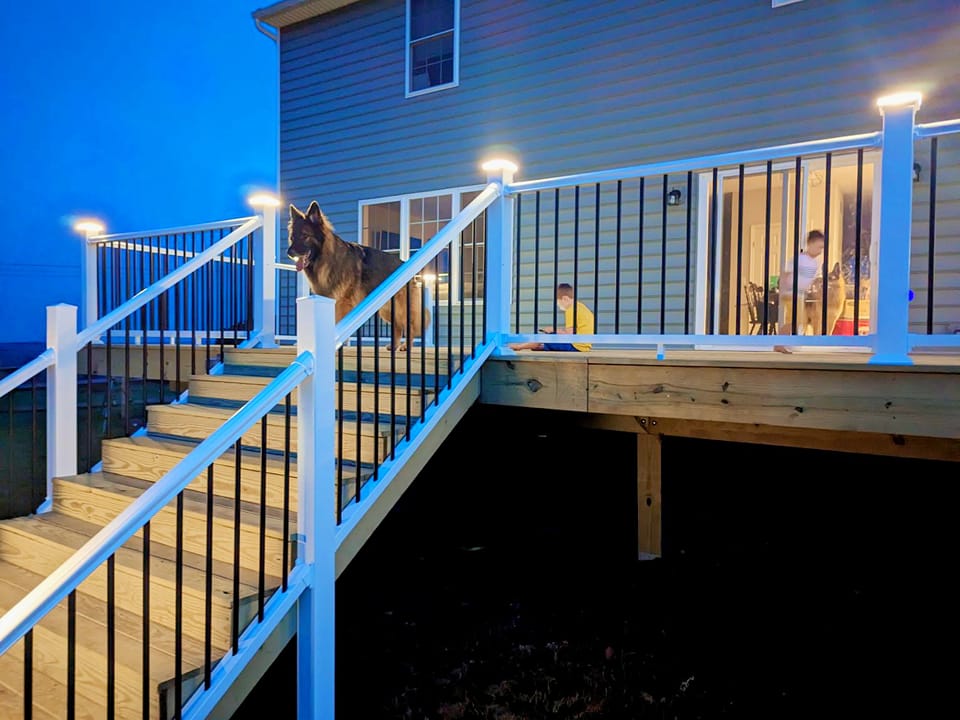
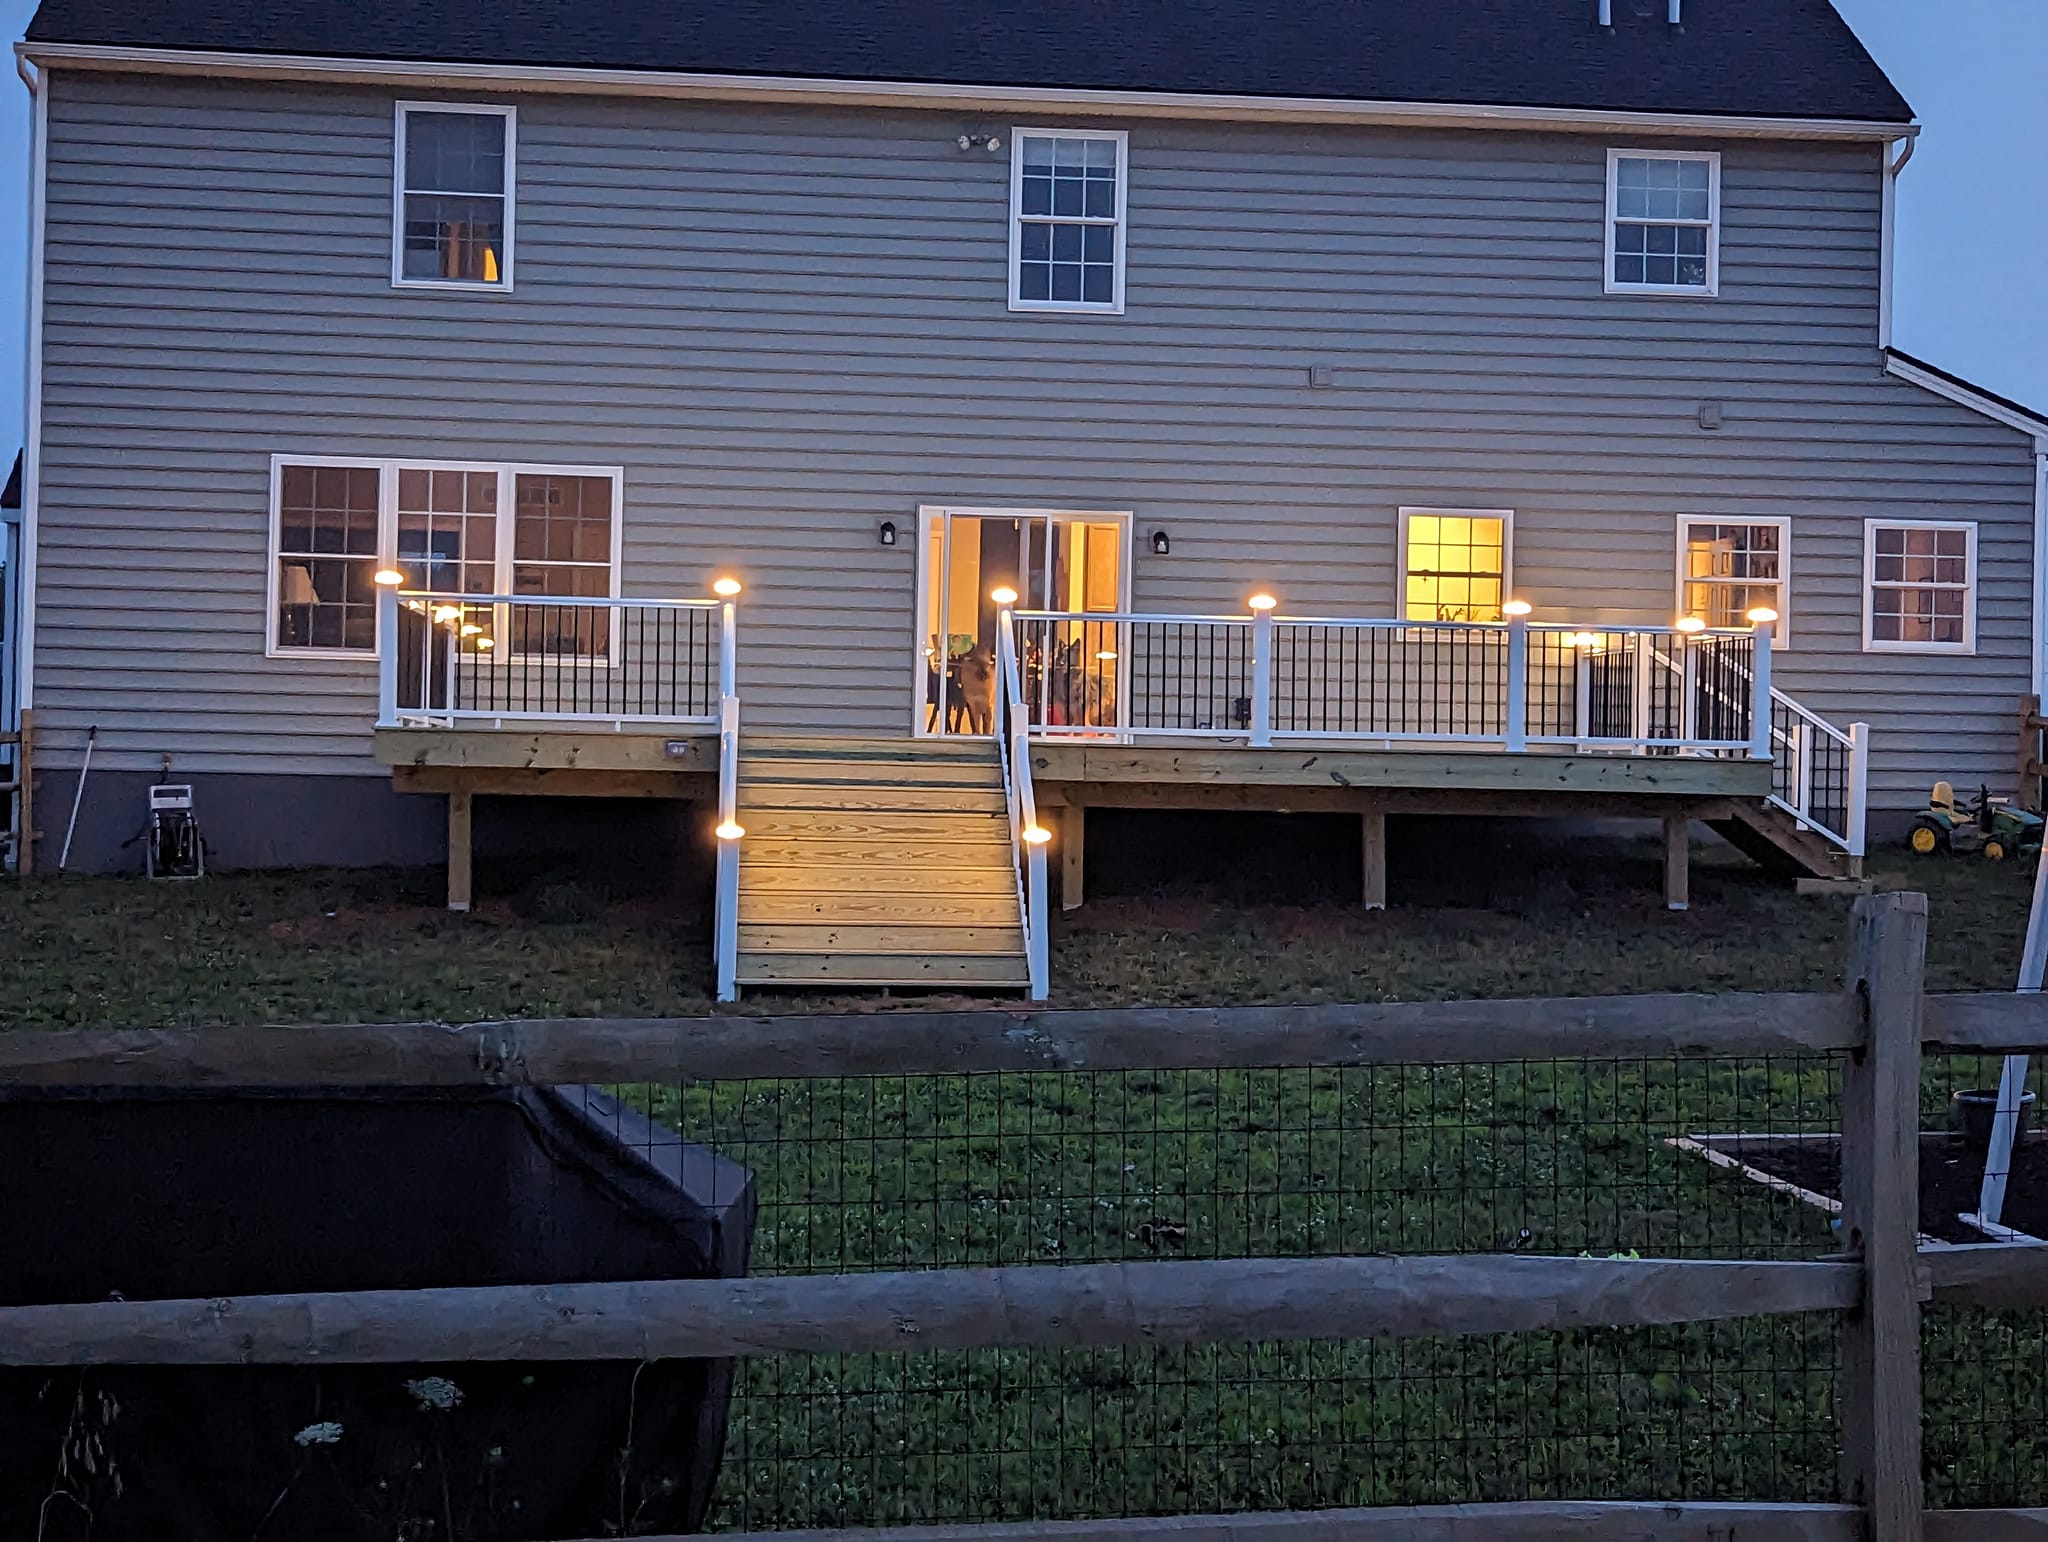
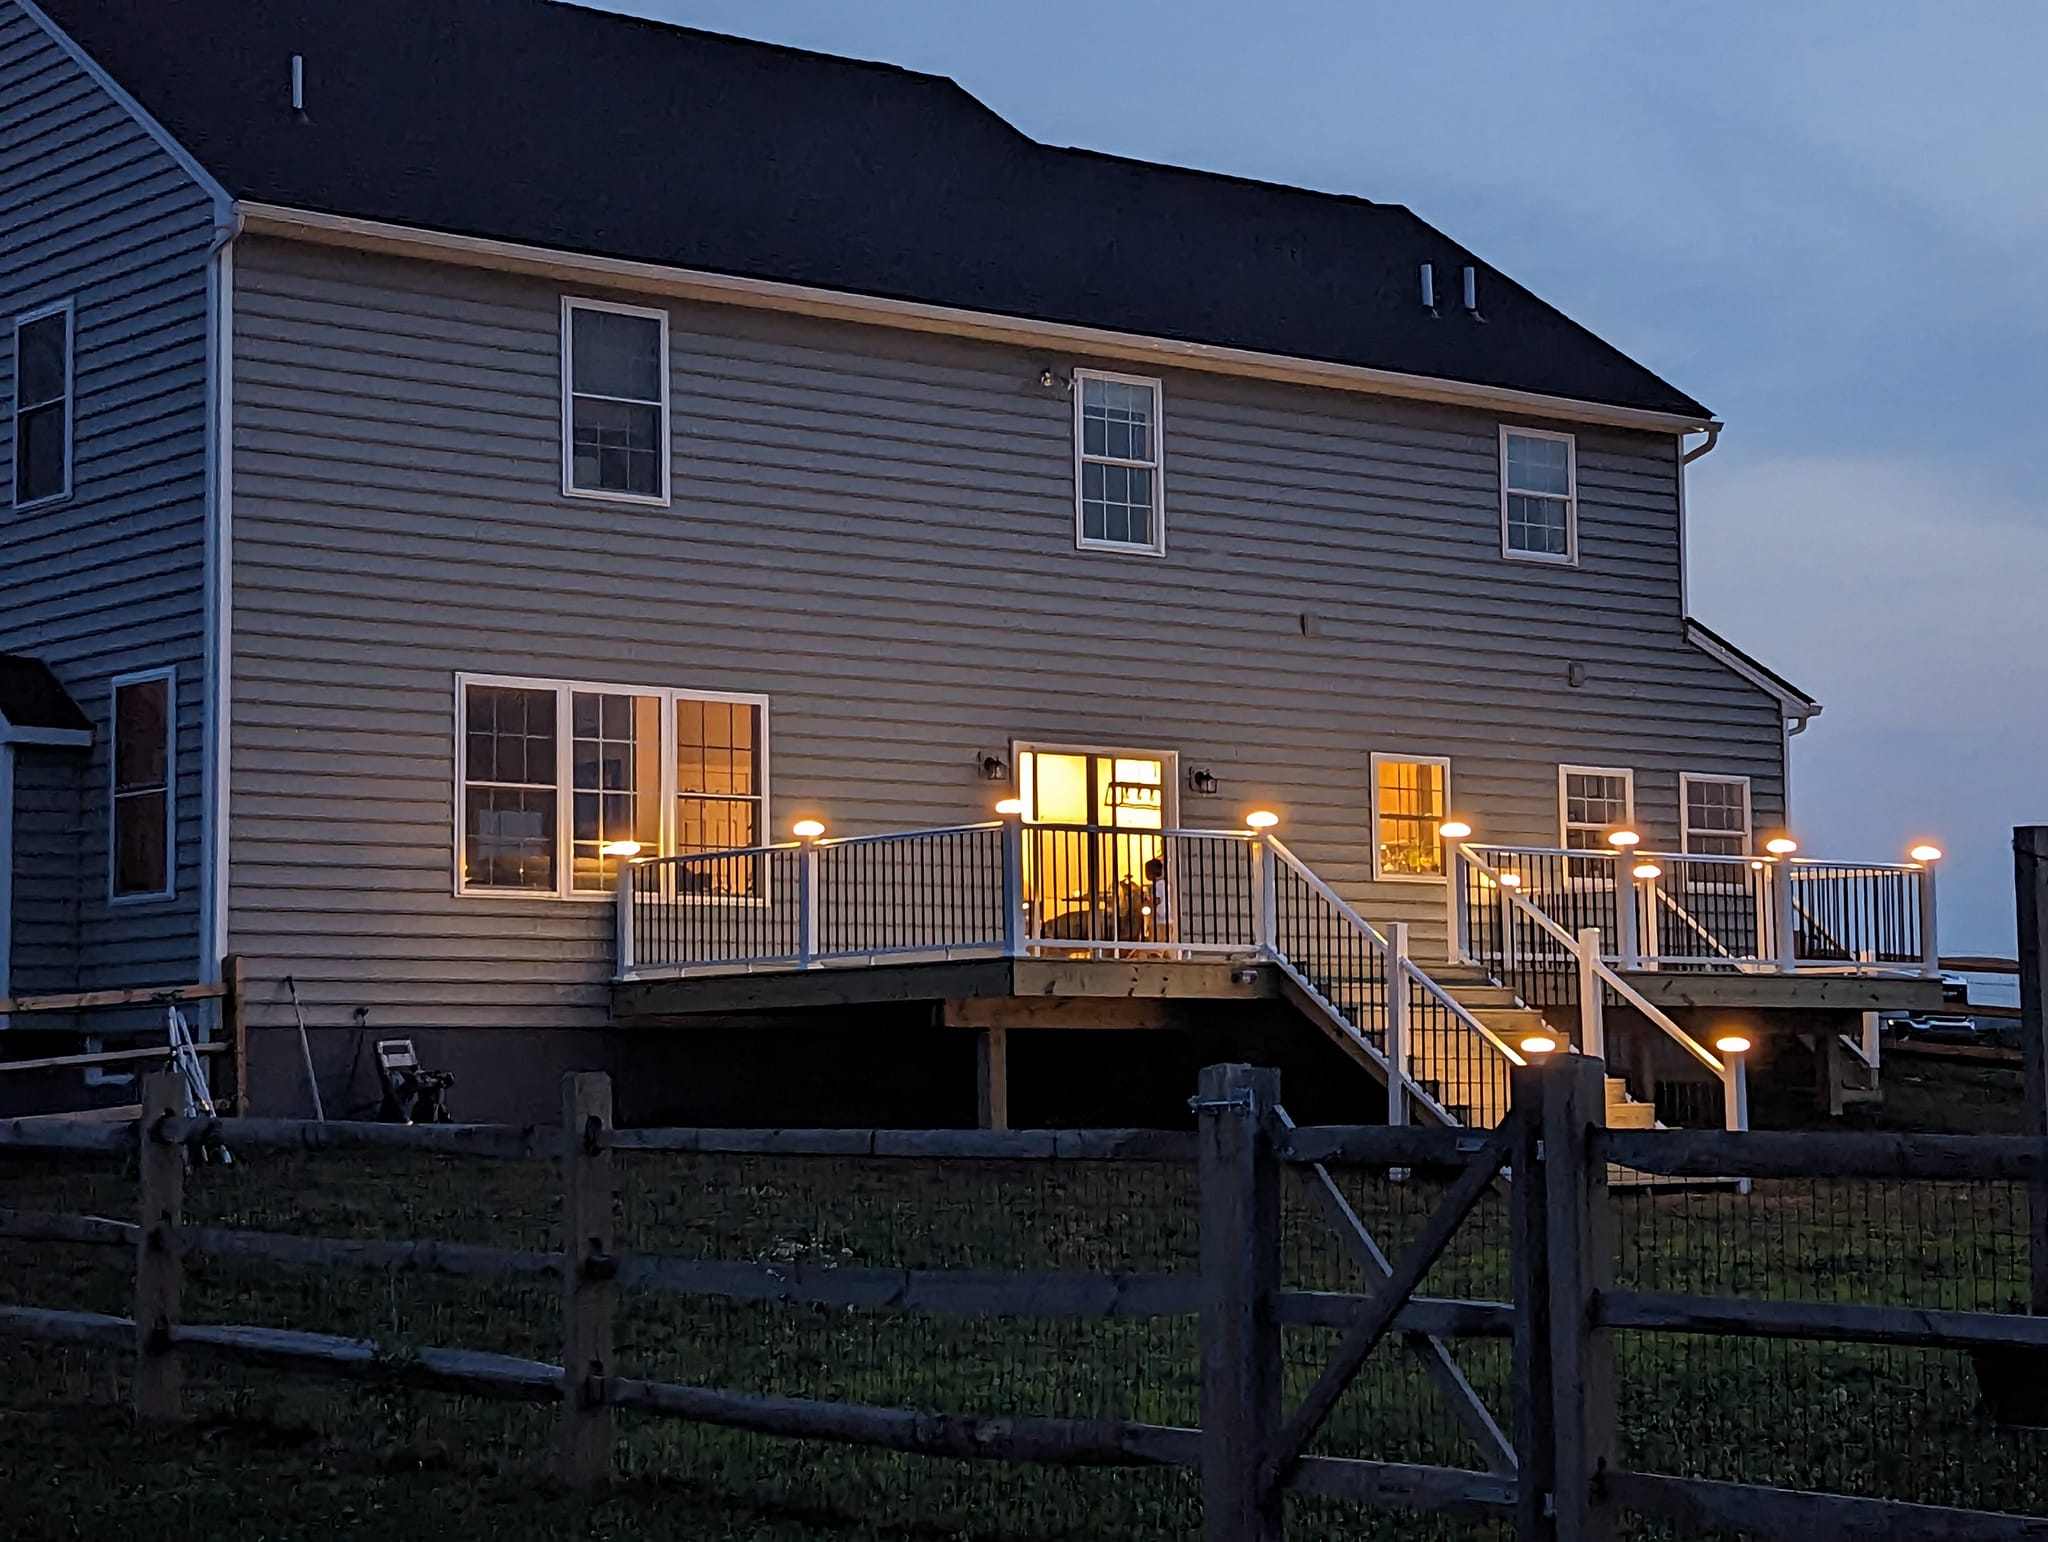
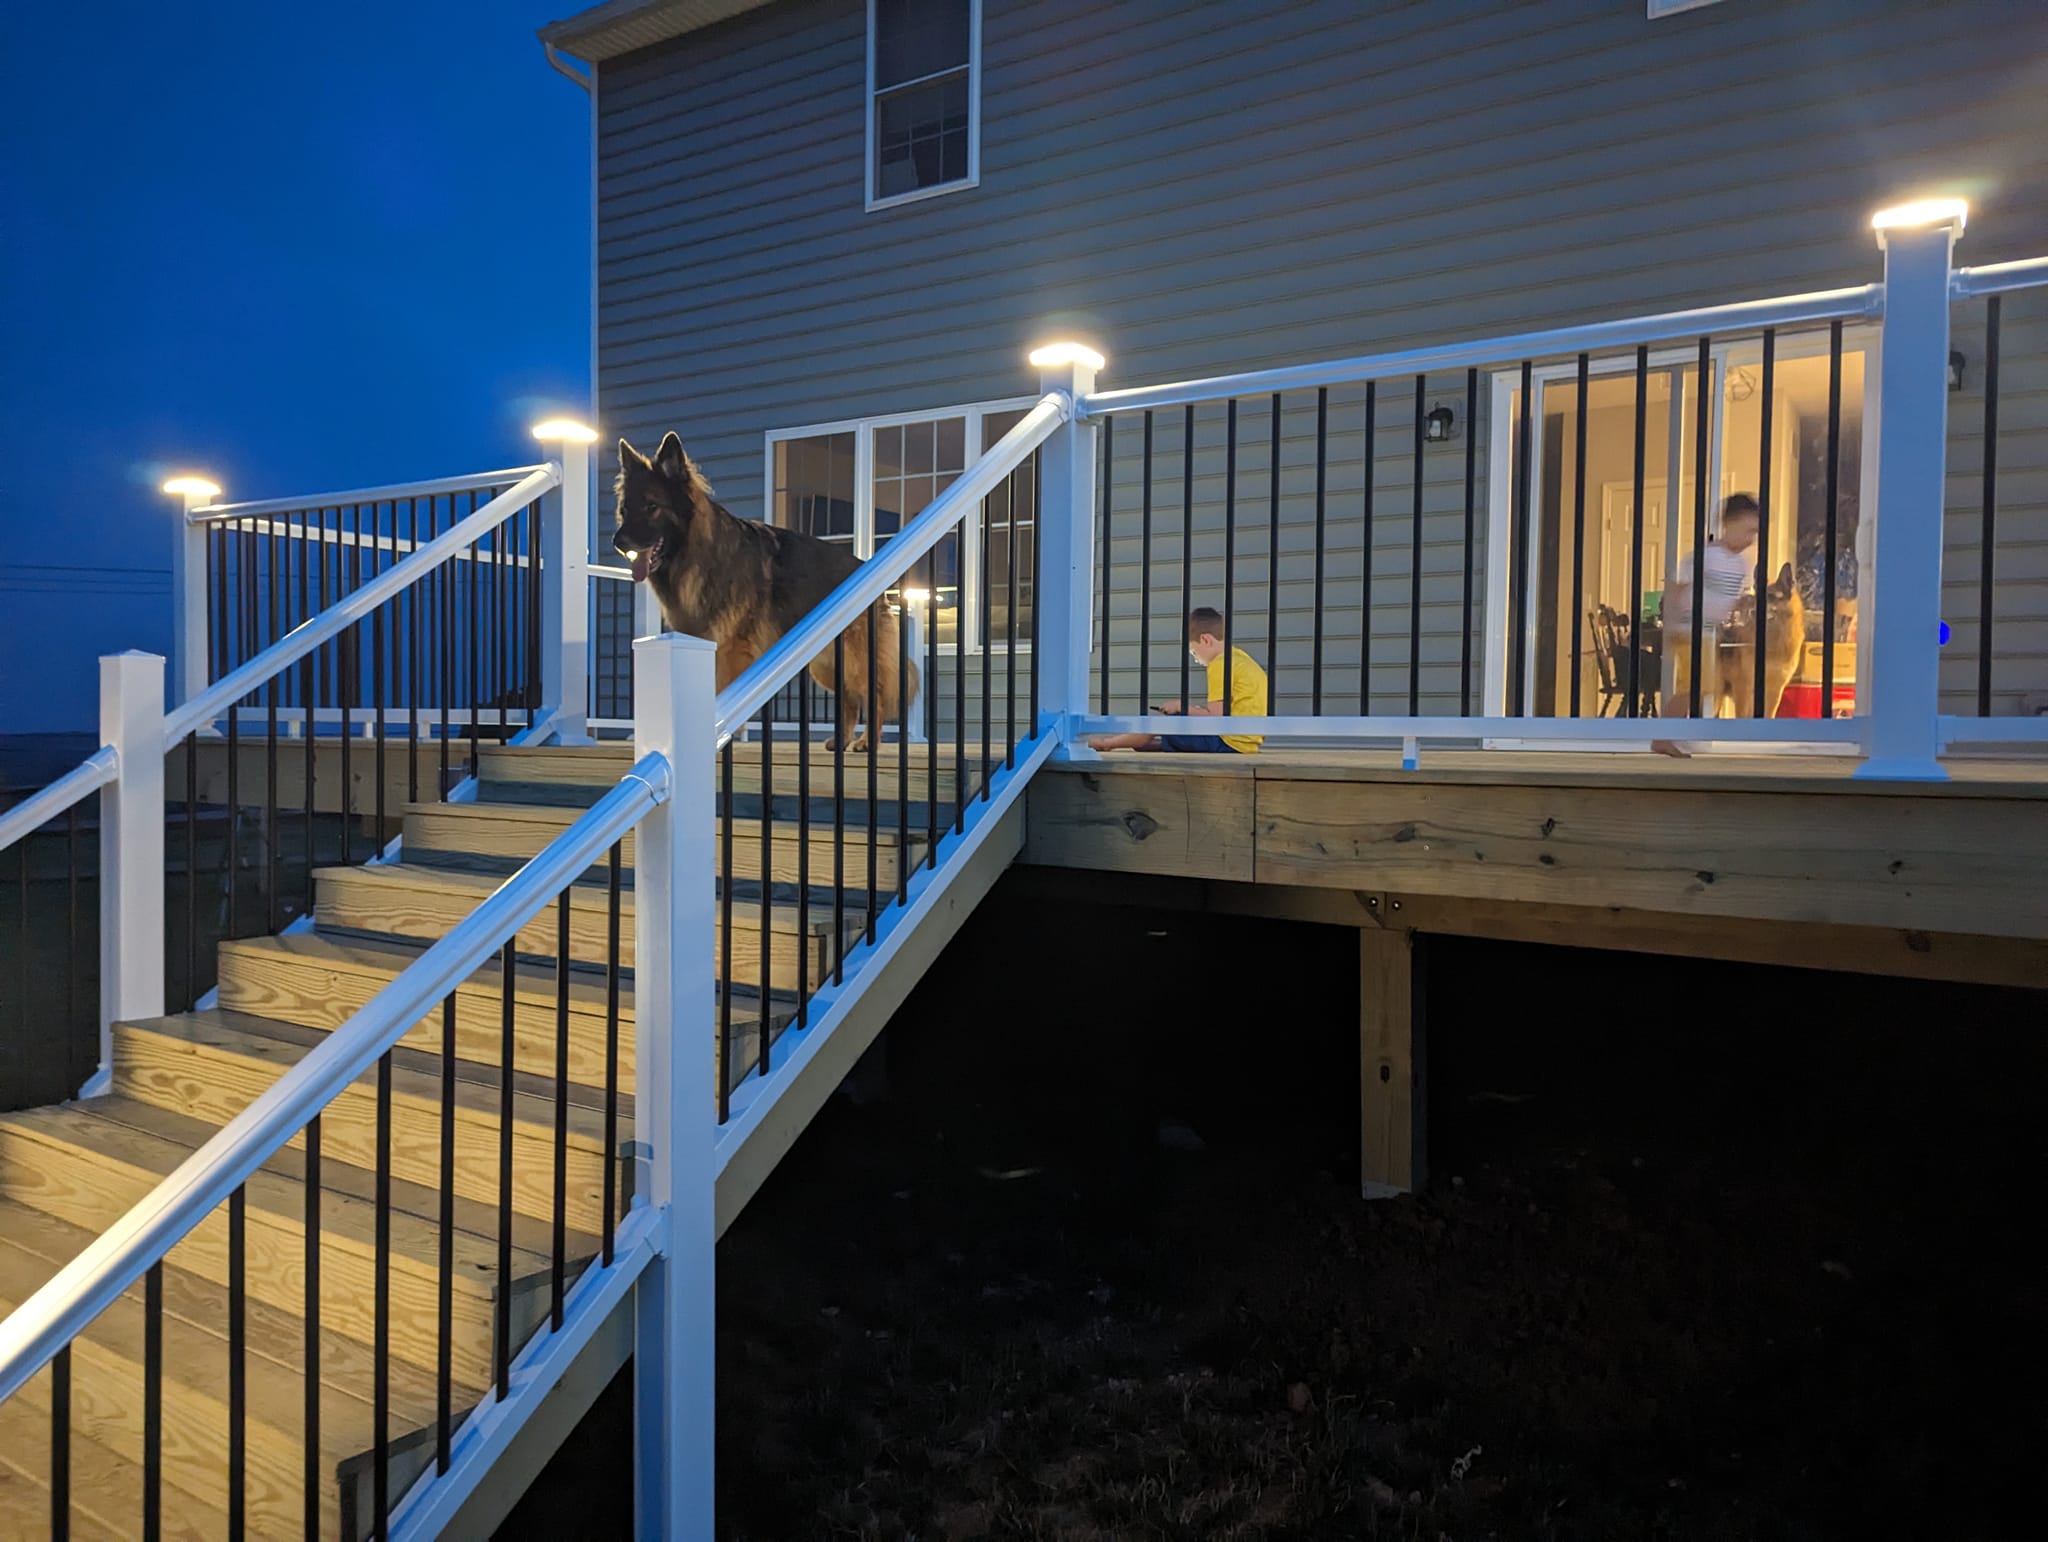
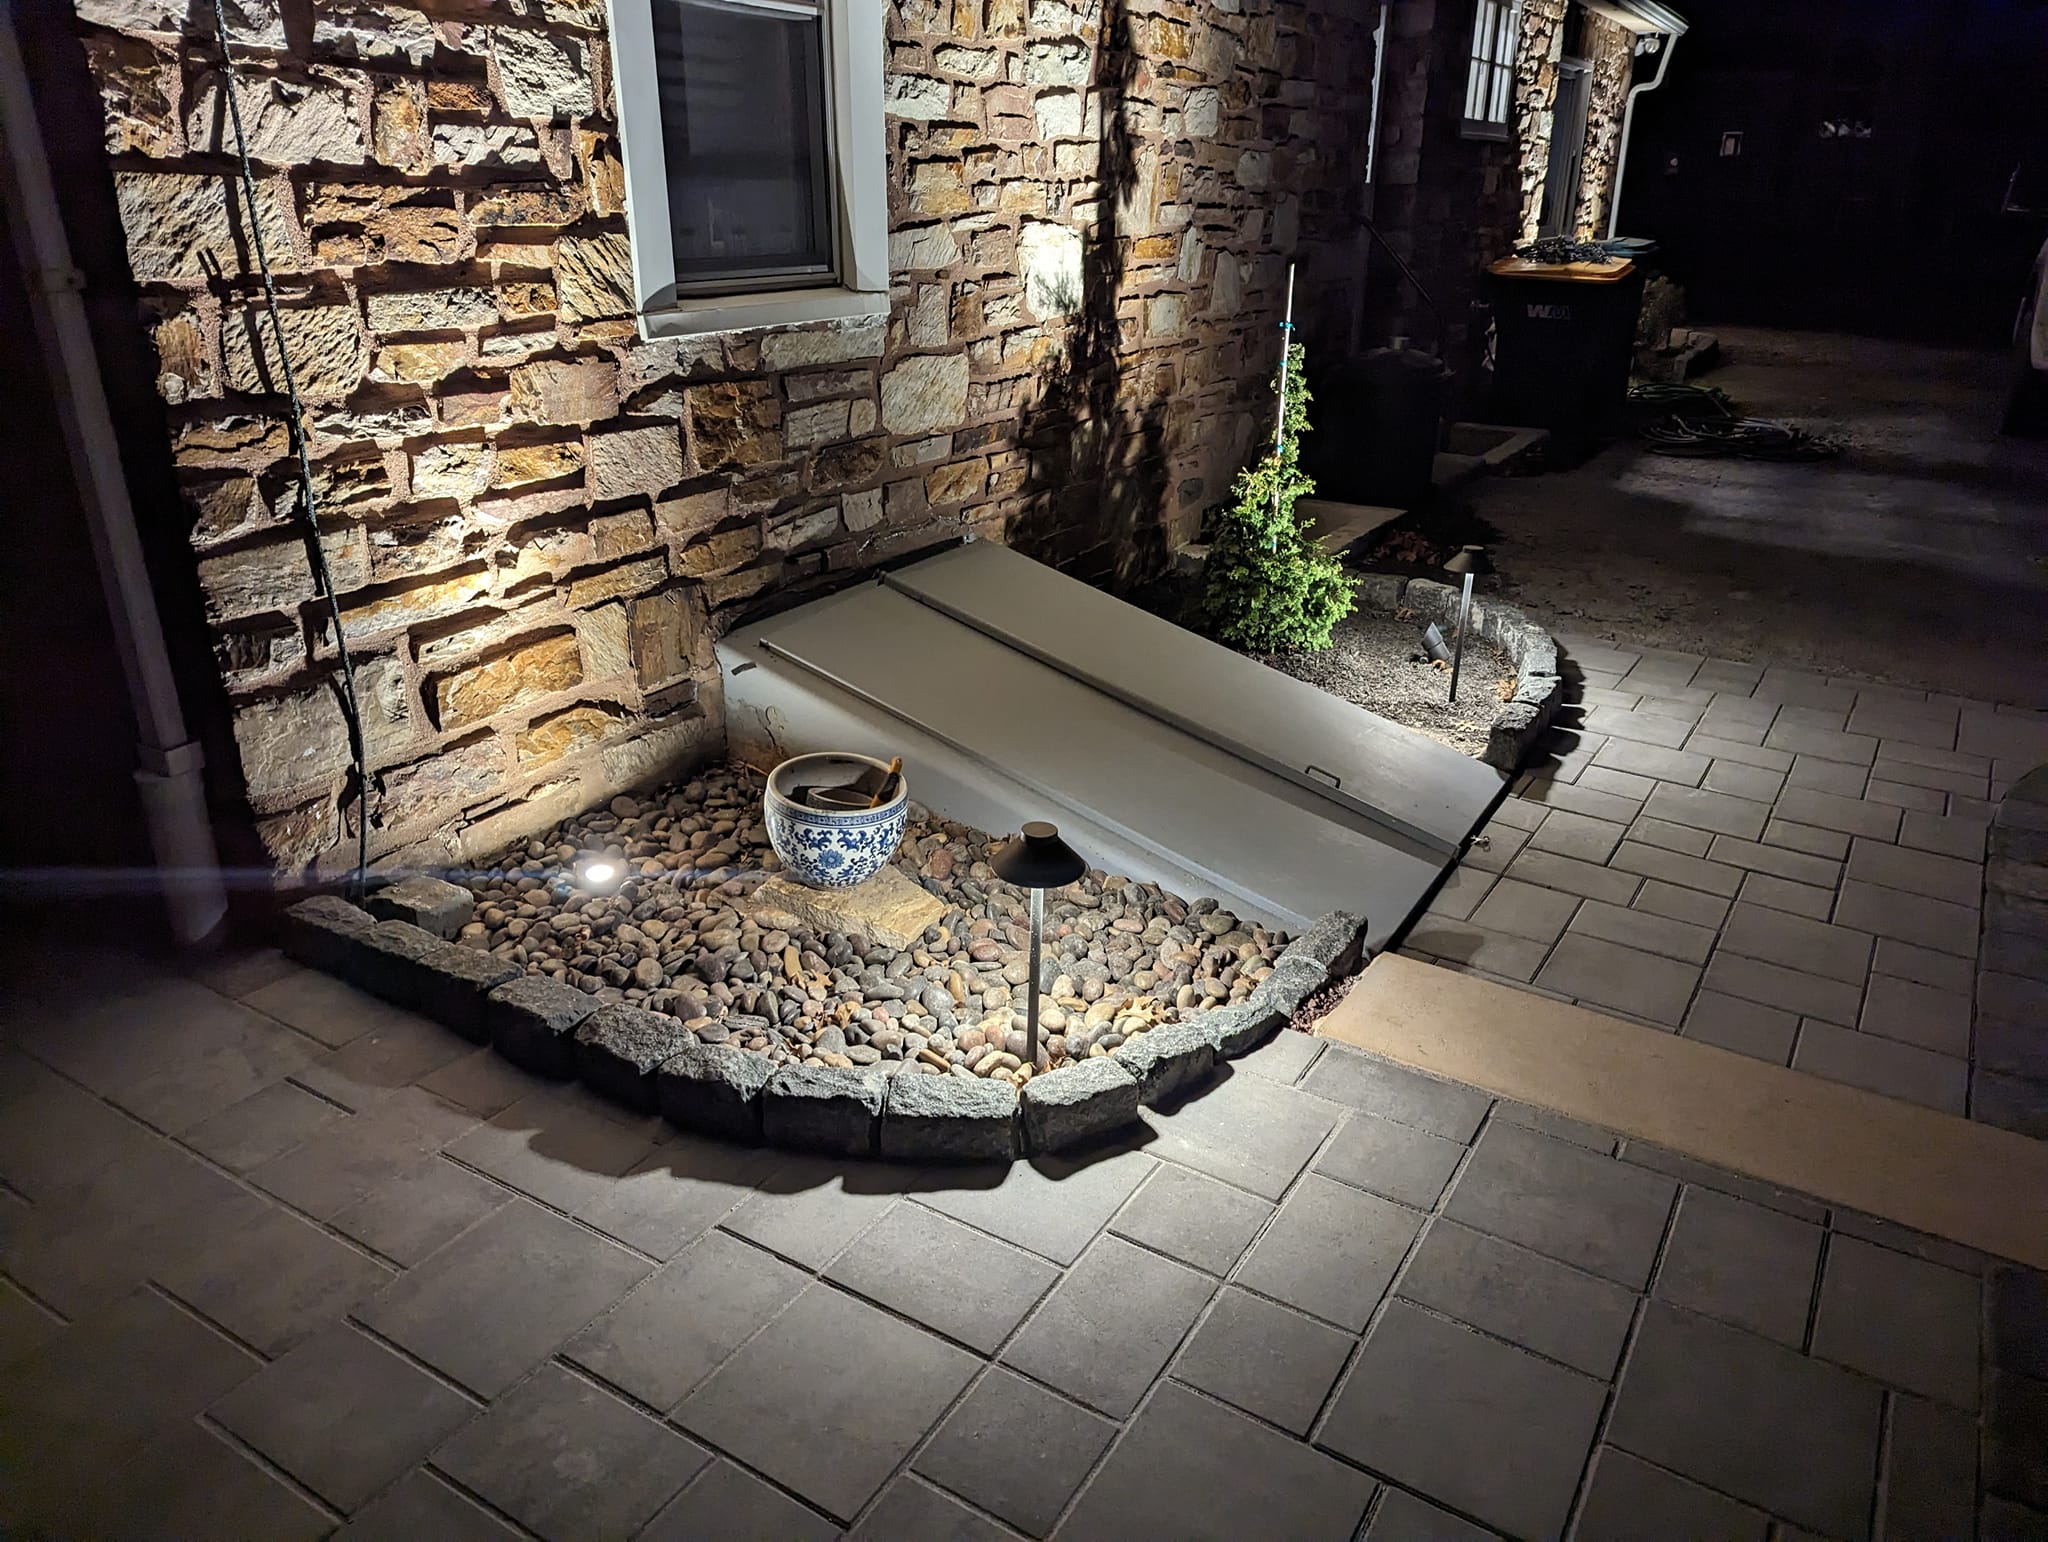
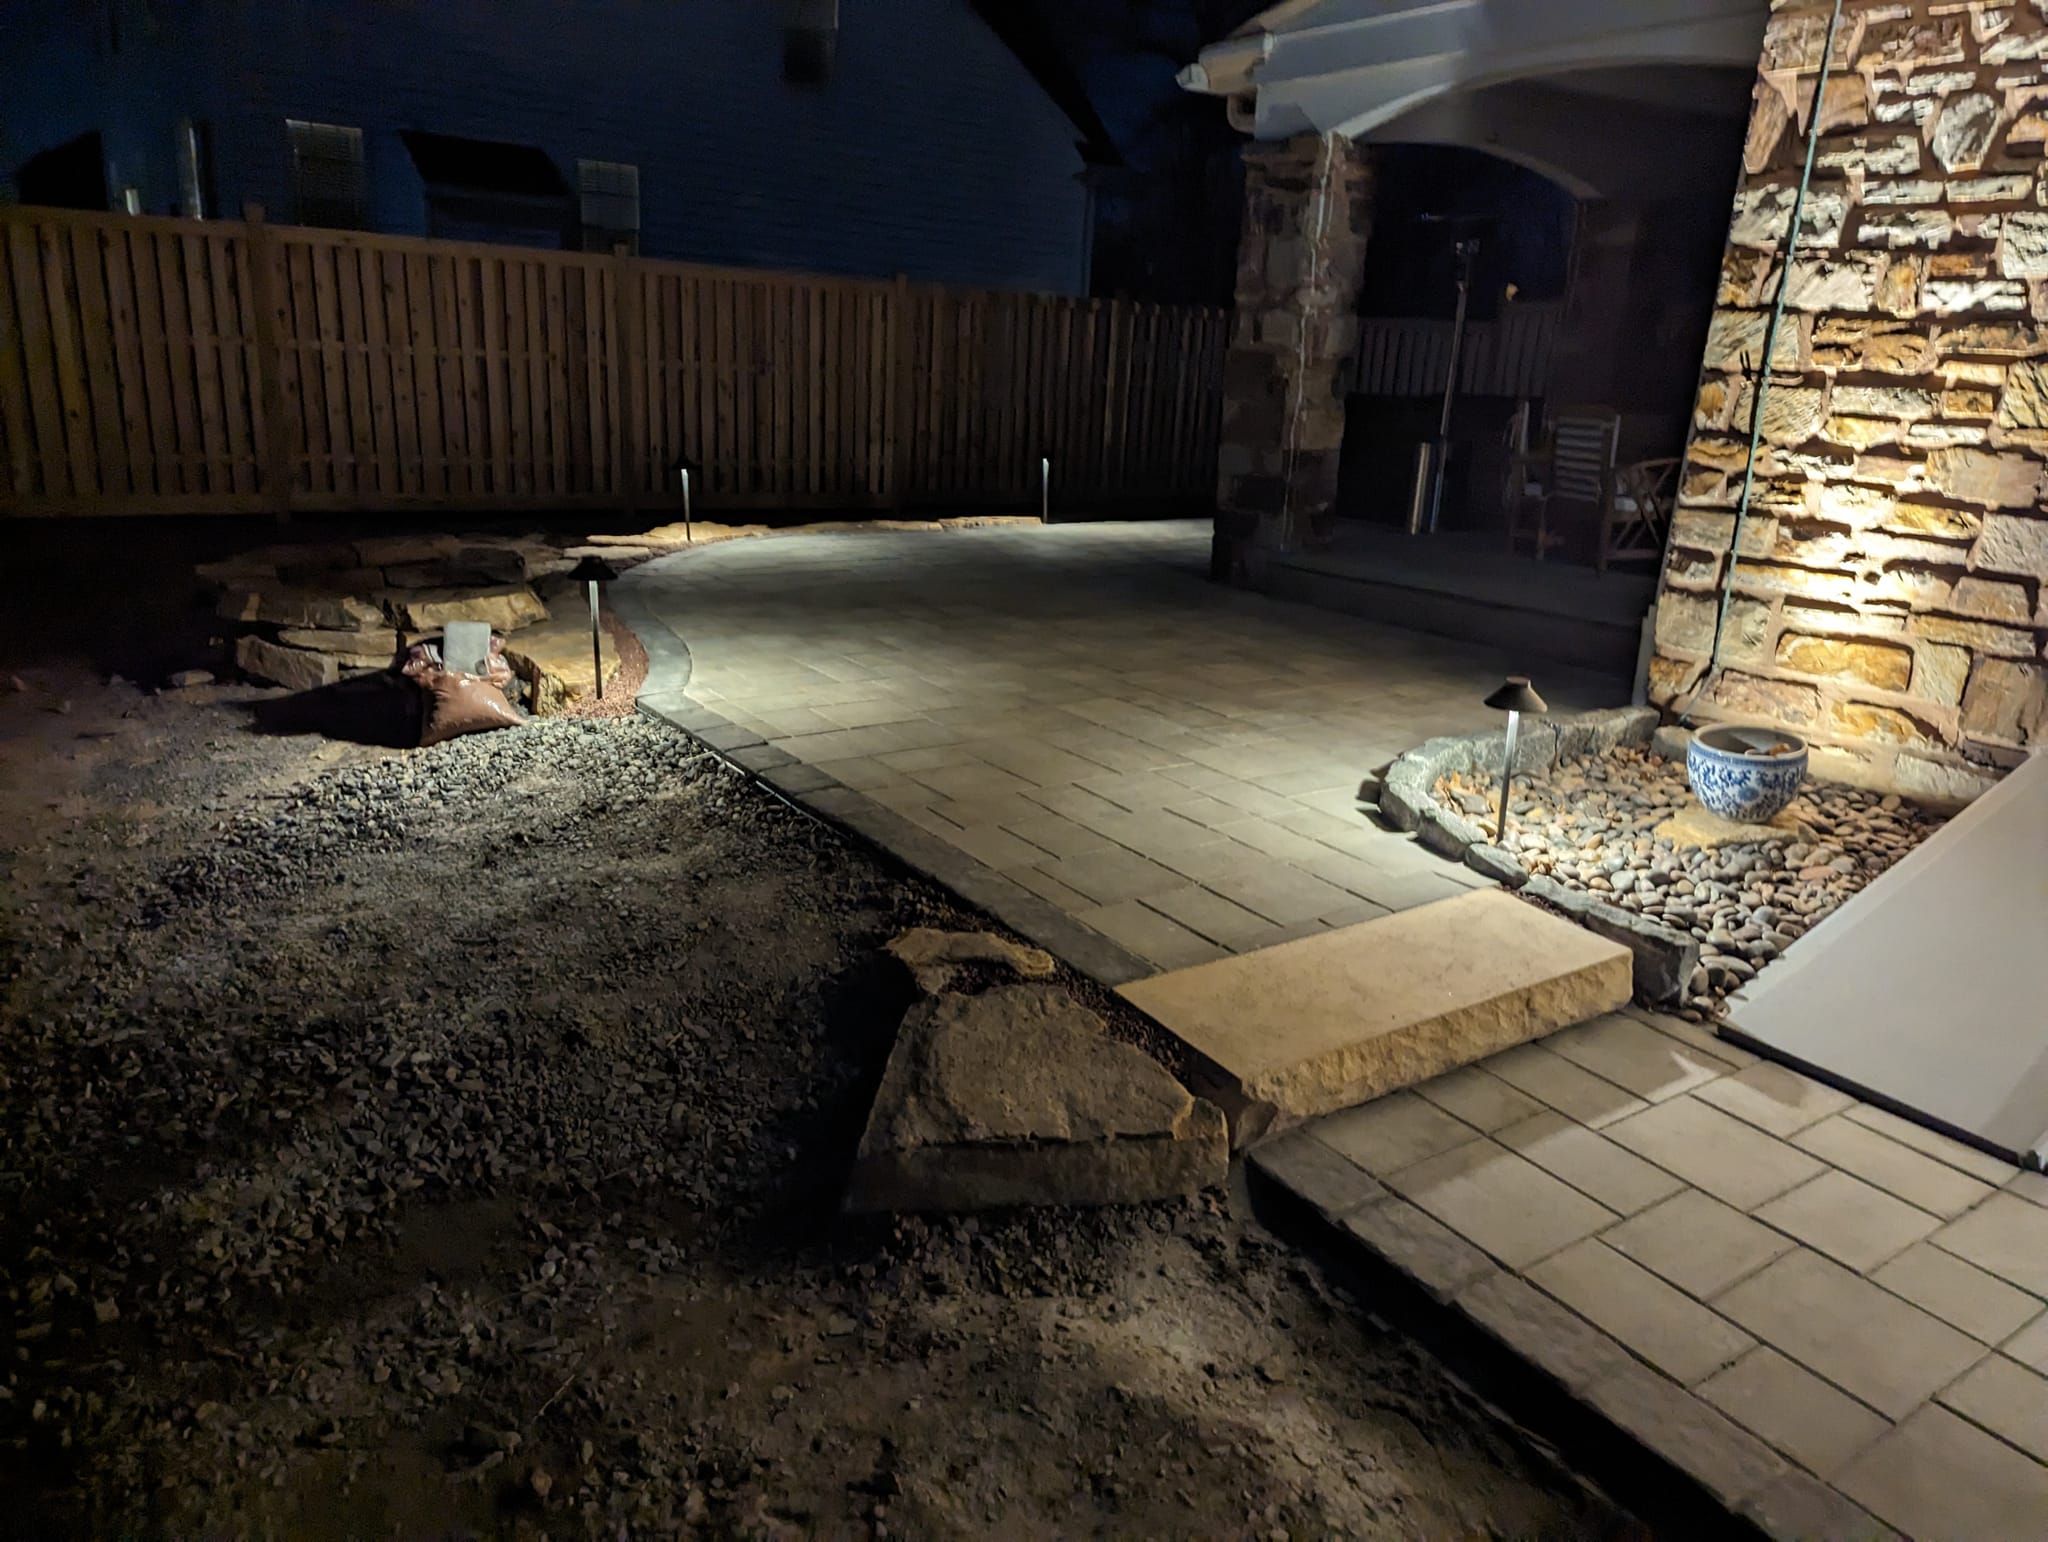
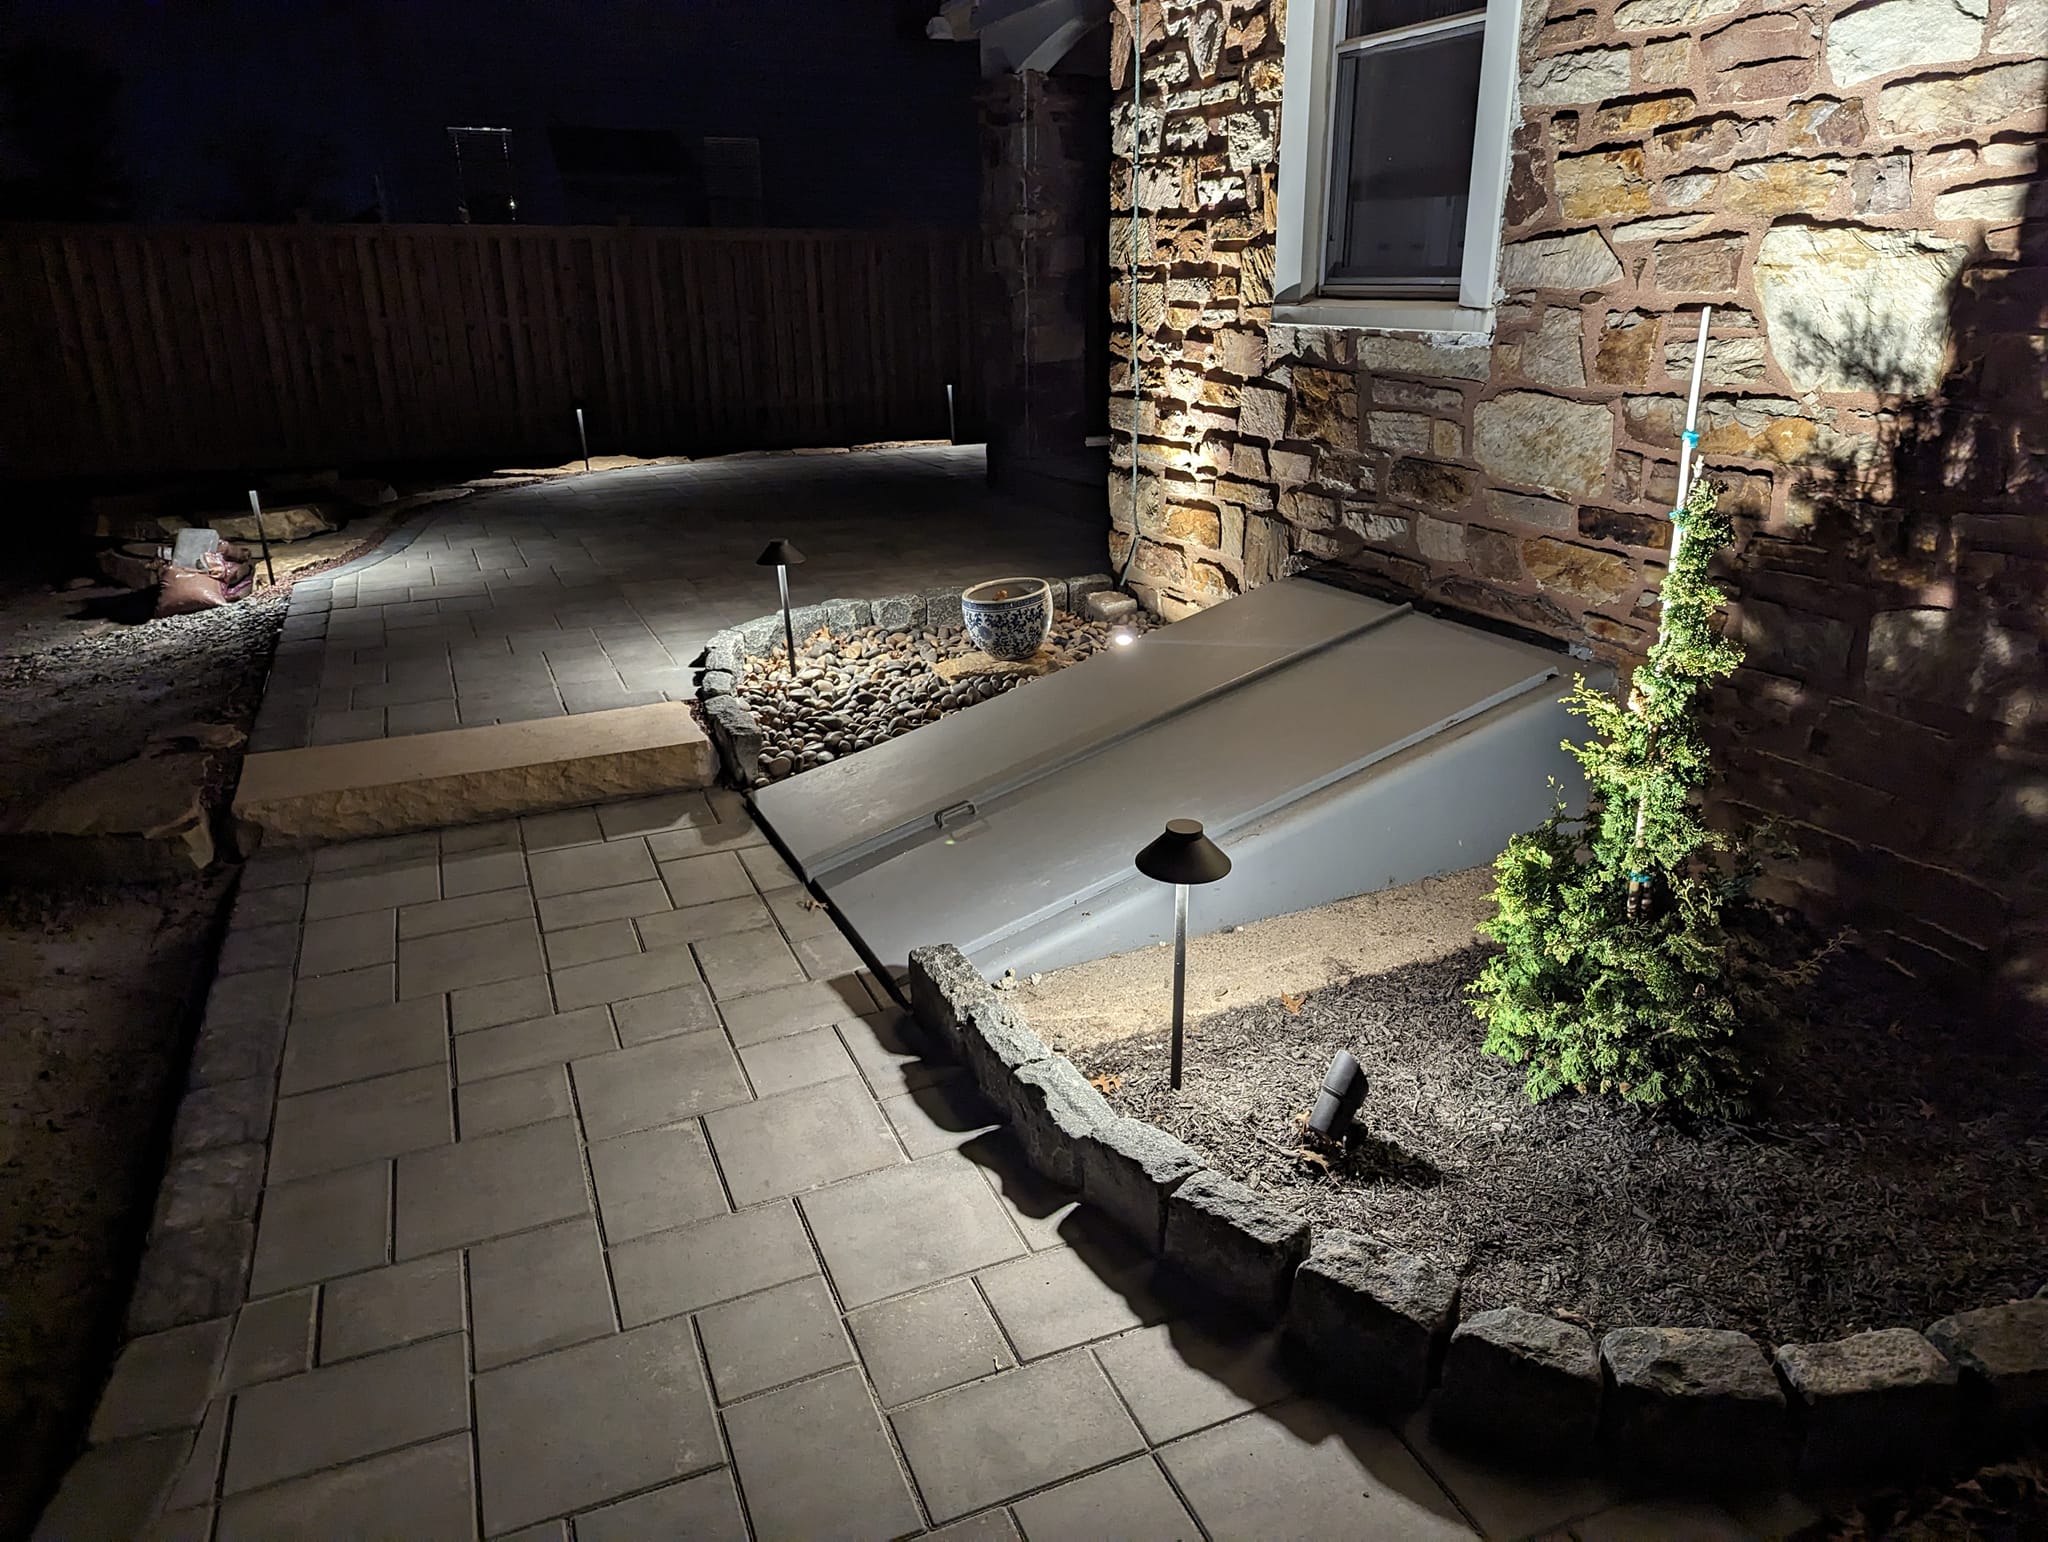
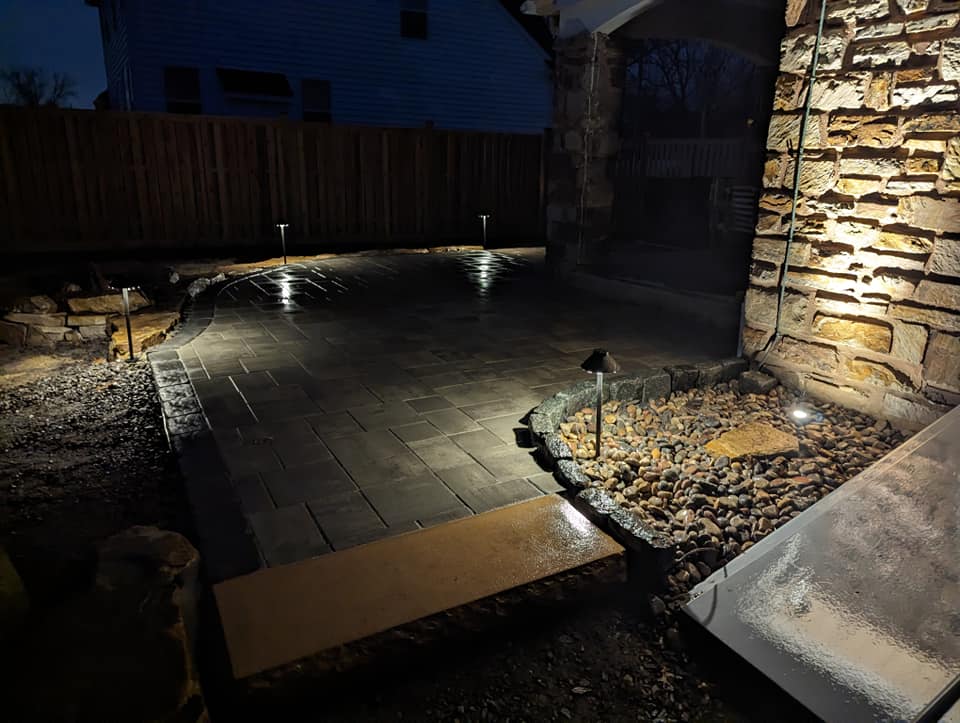
LED Lighting Installations
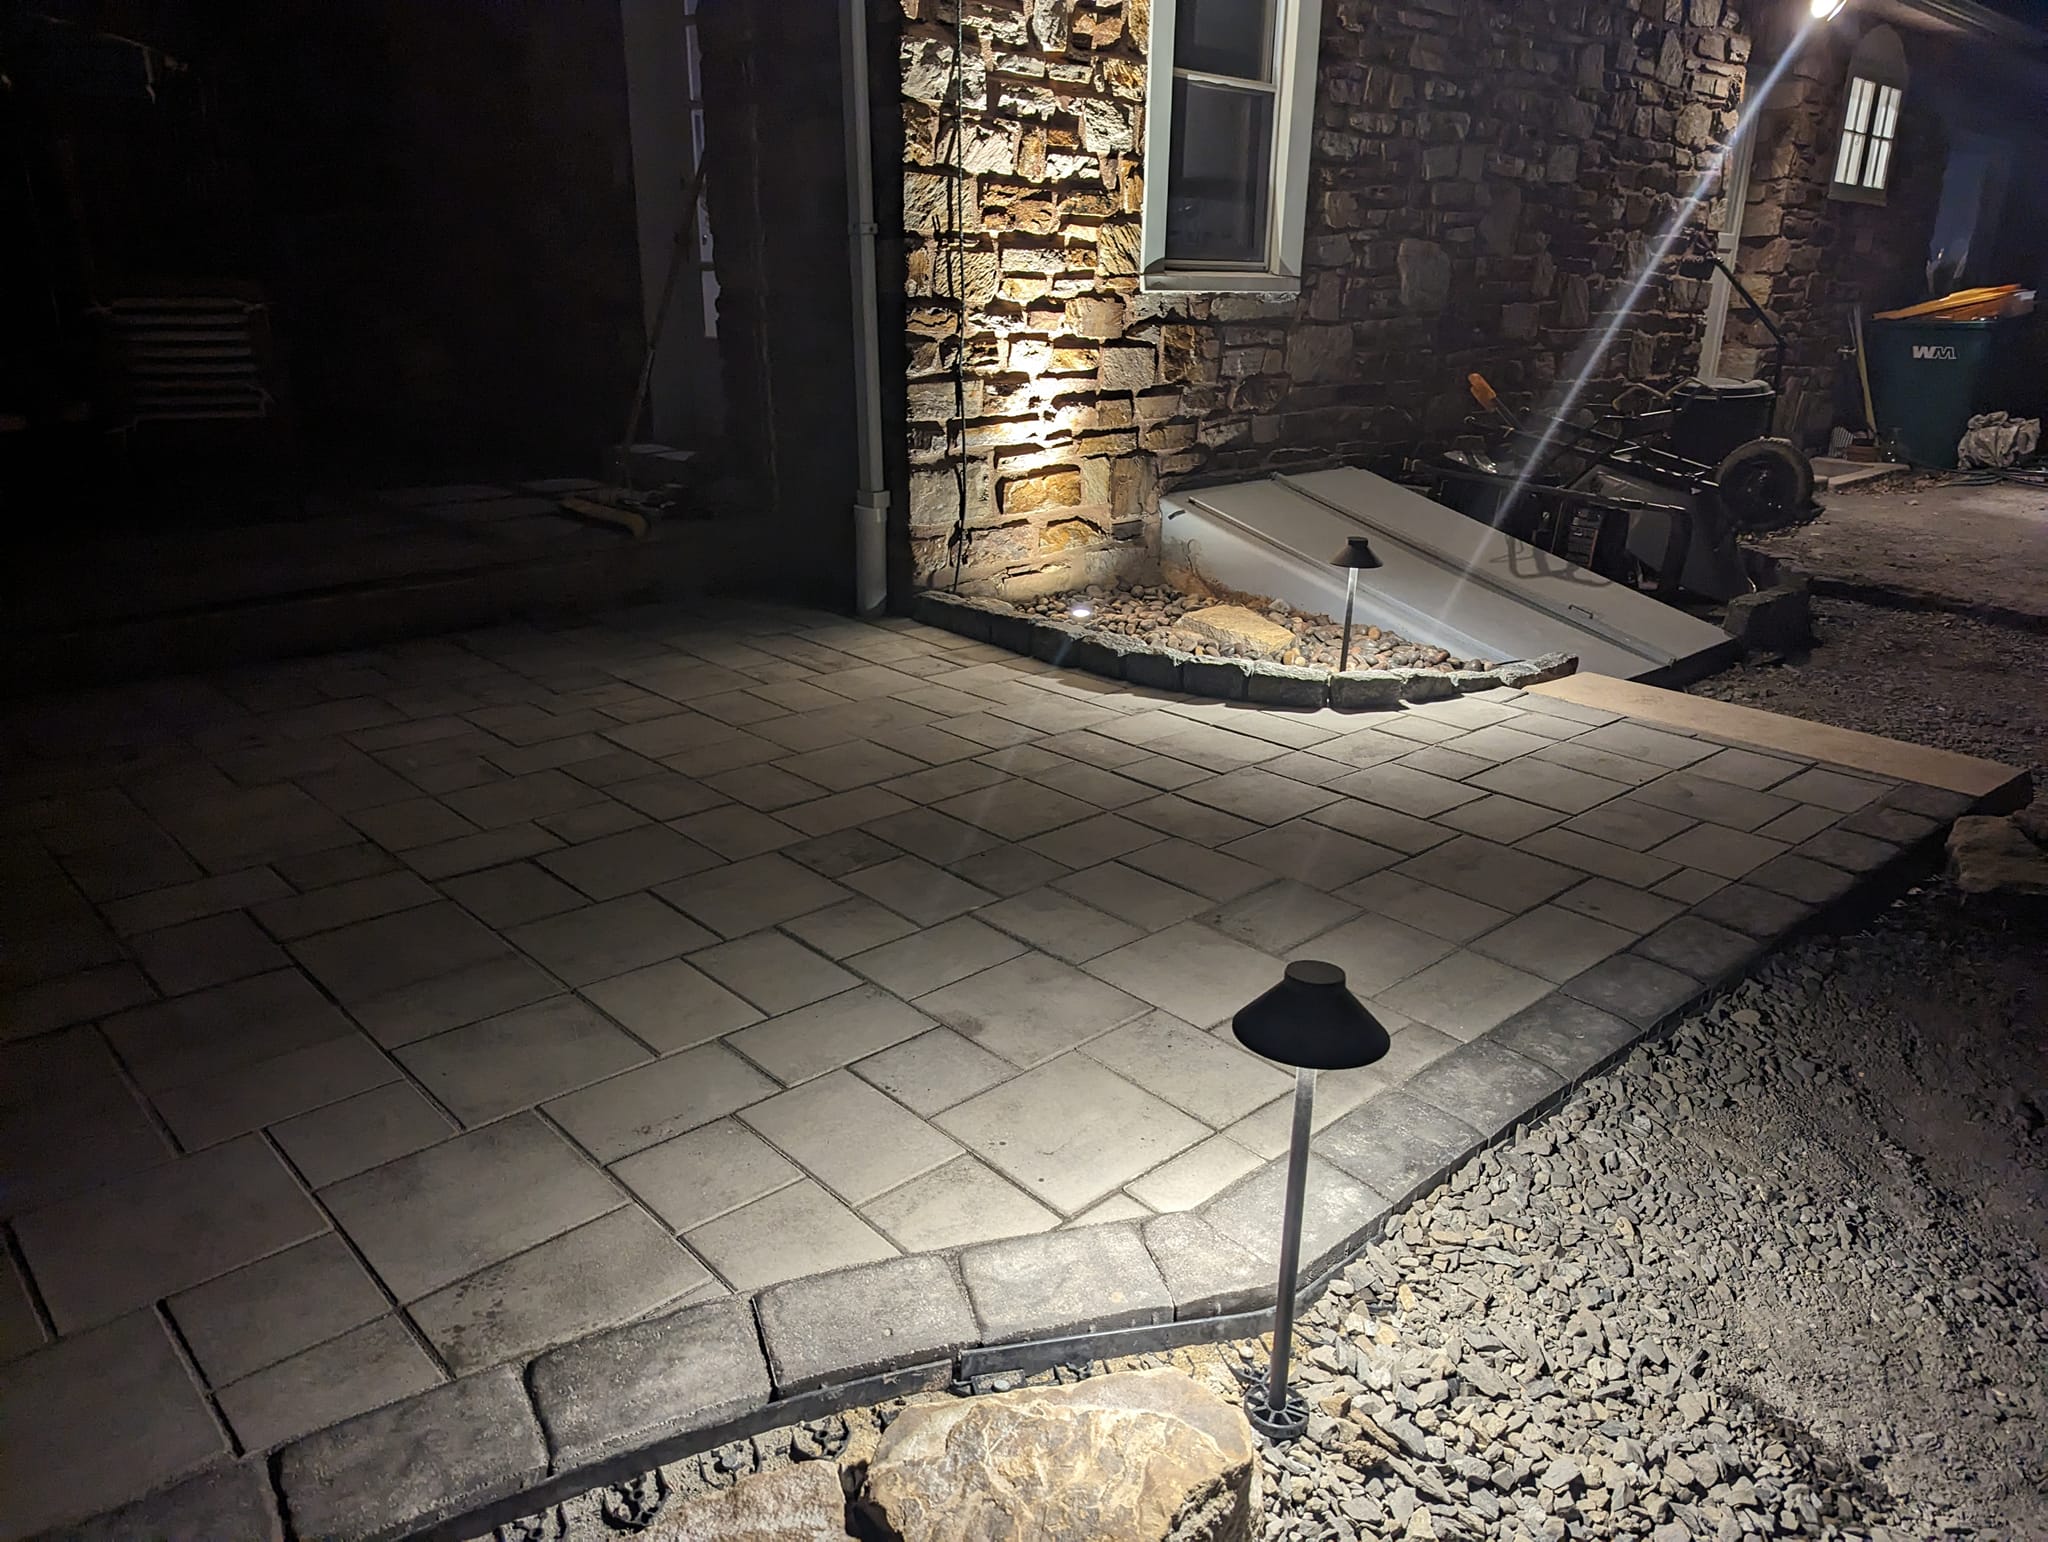
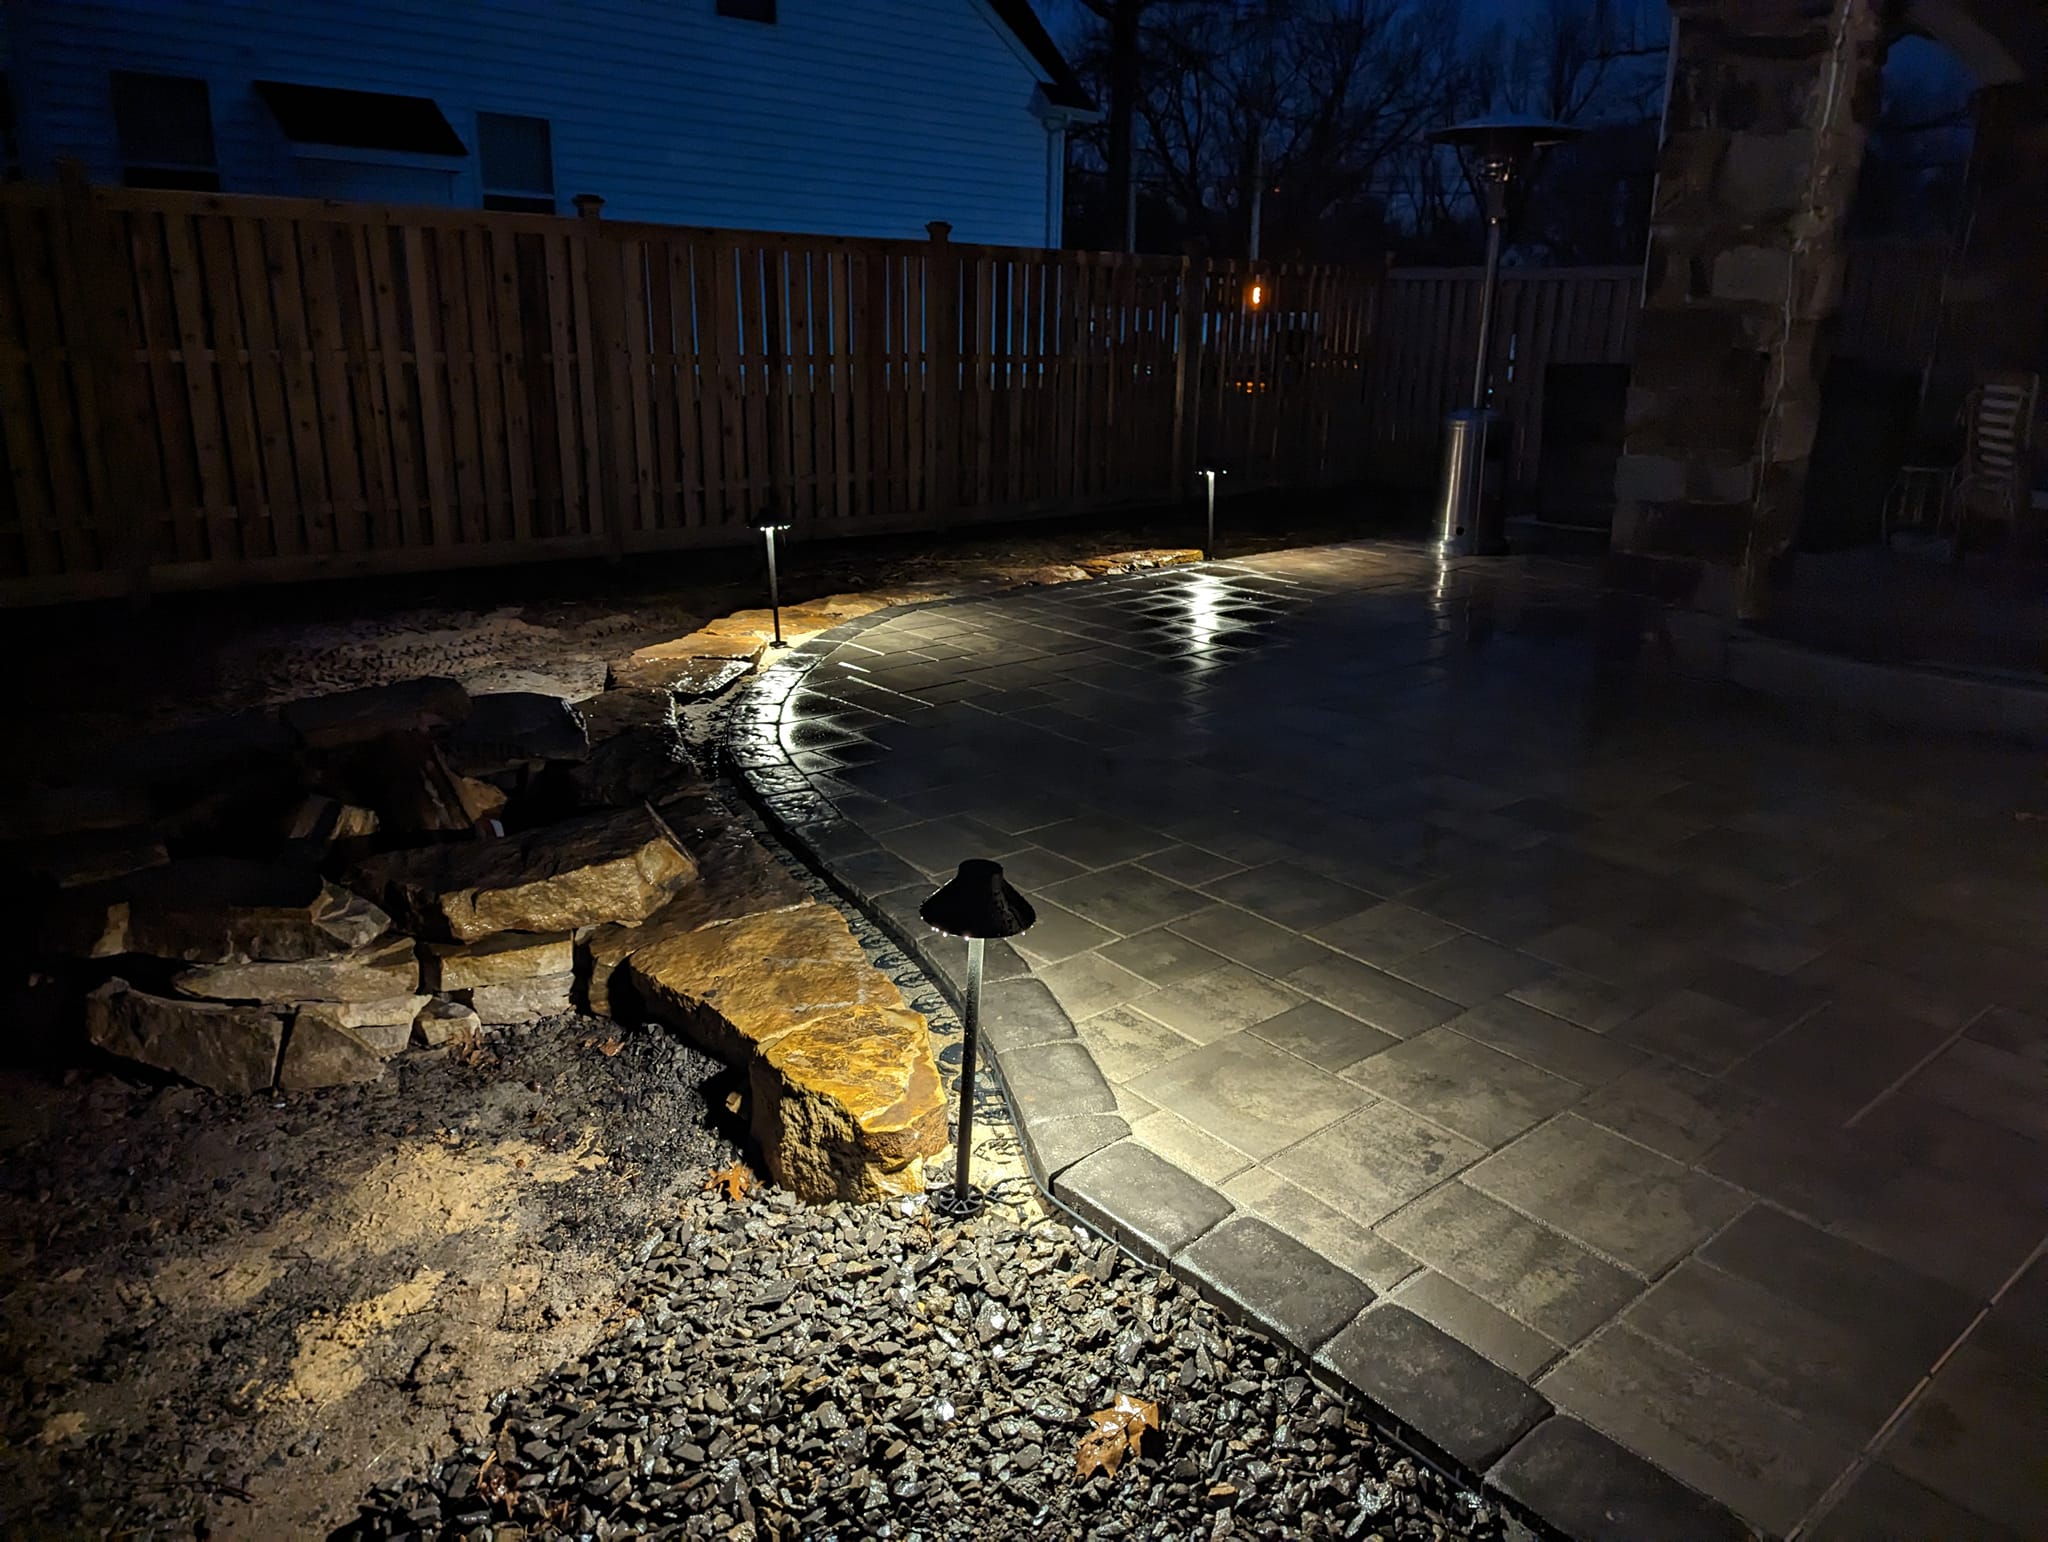
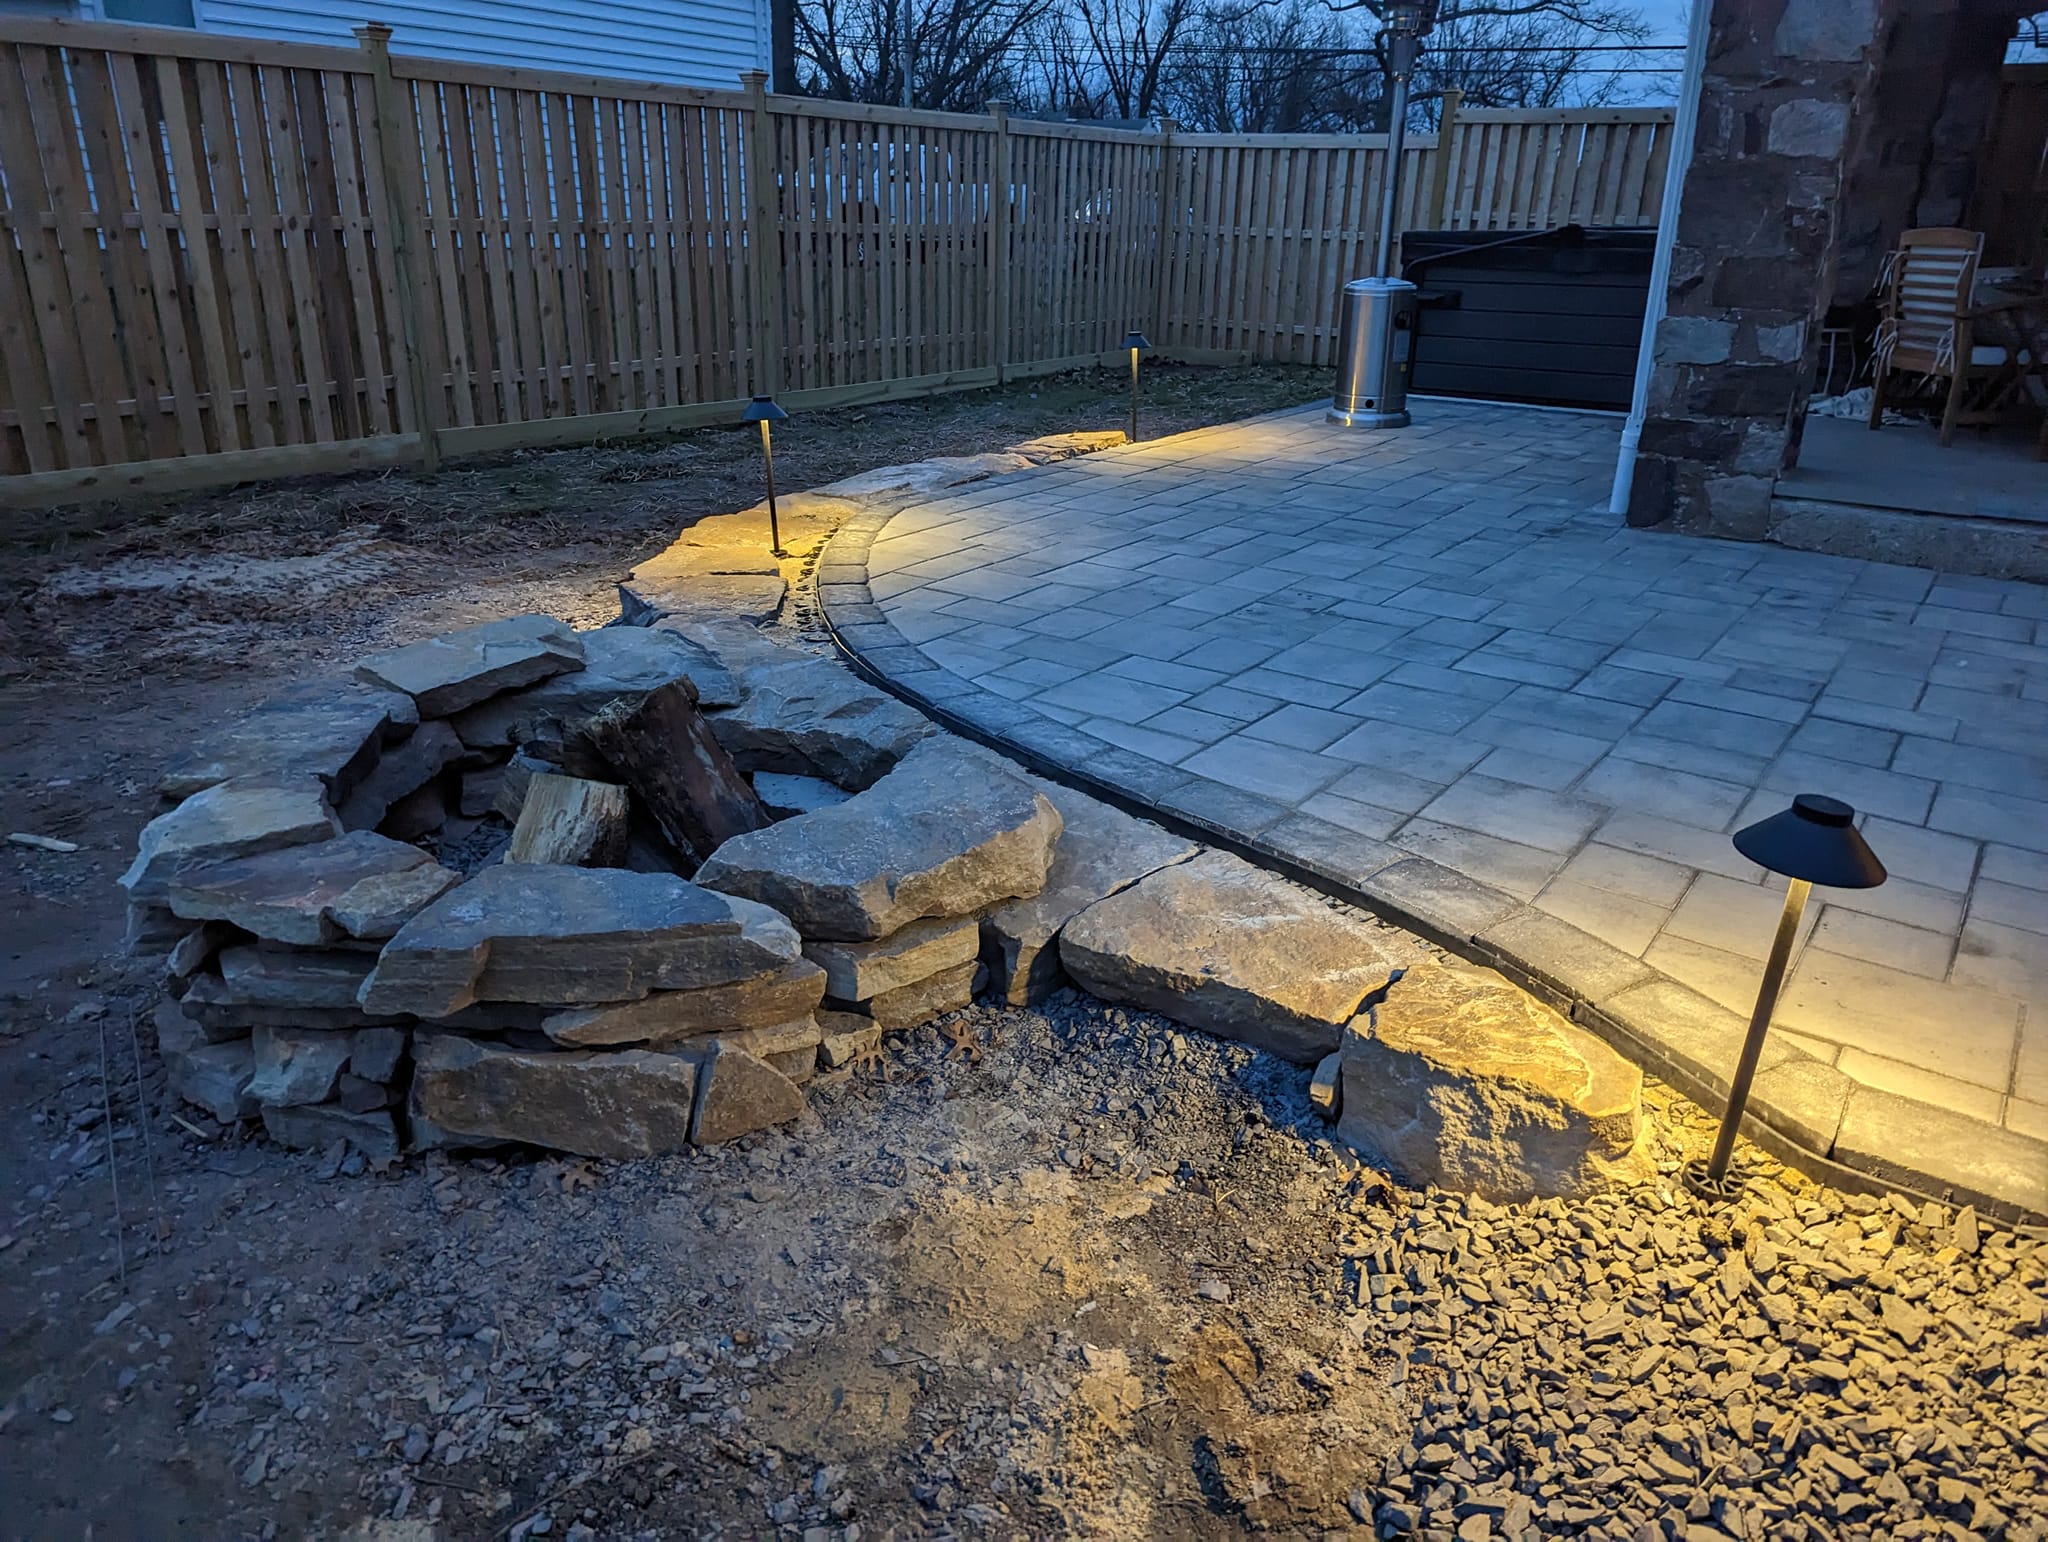
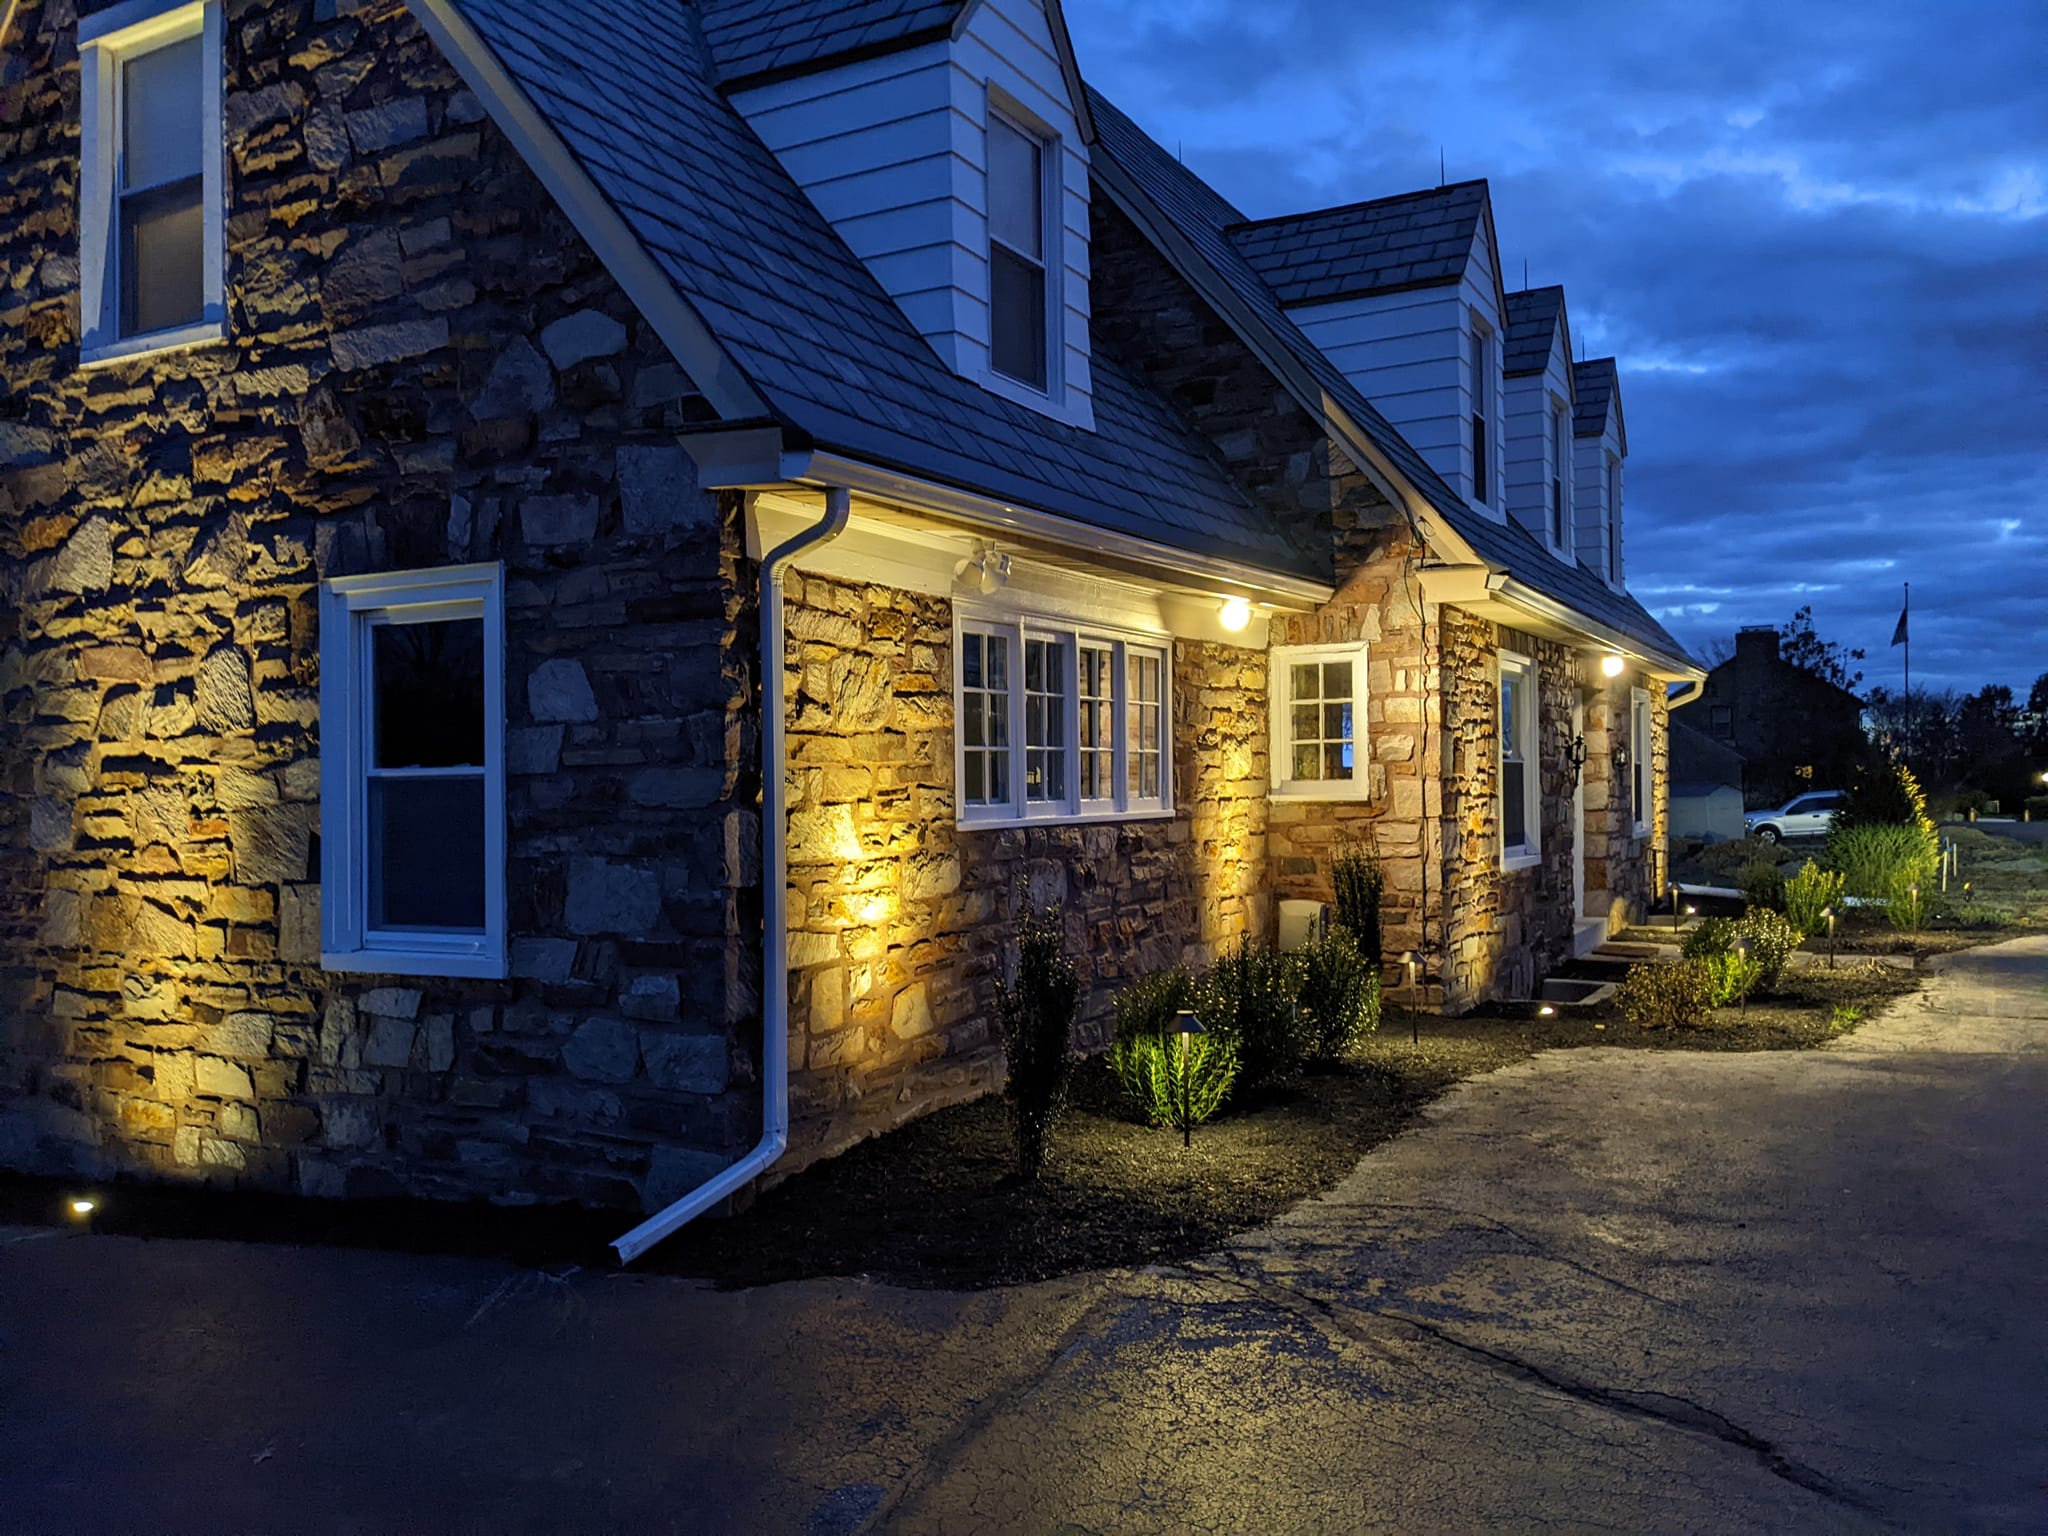
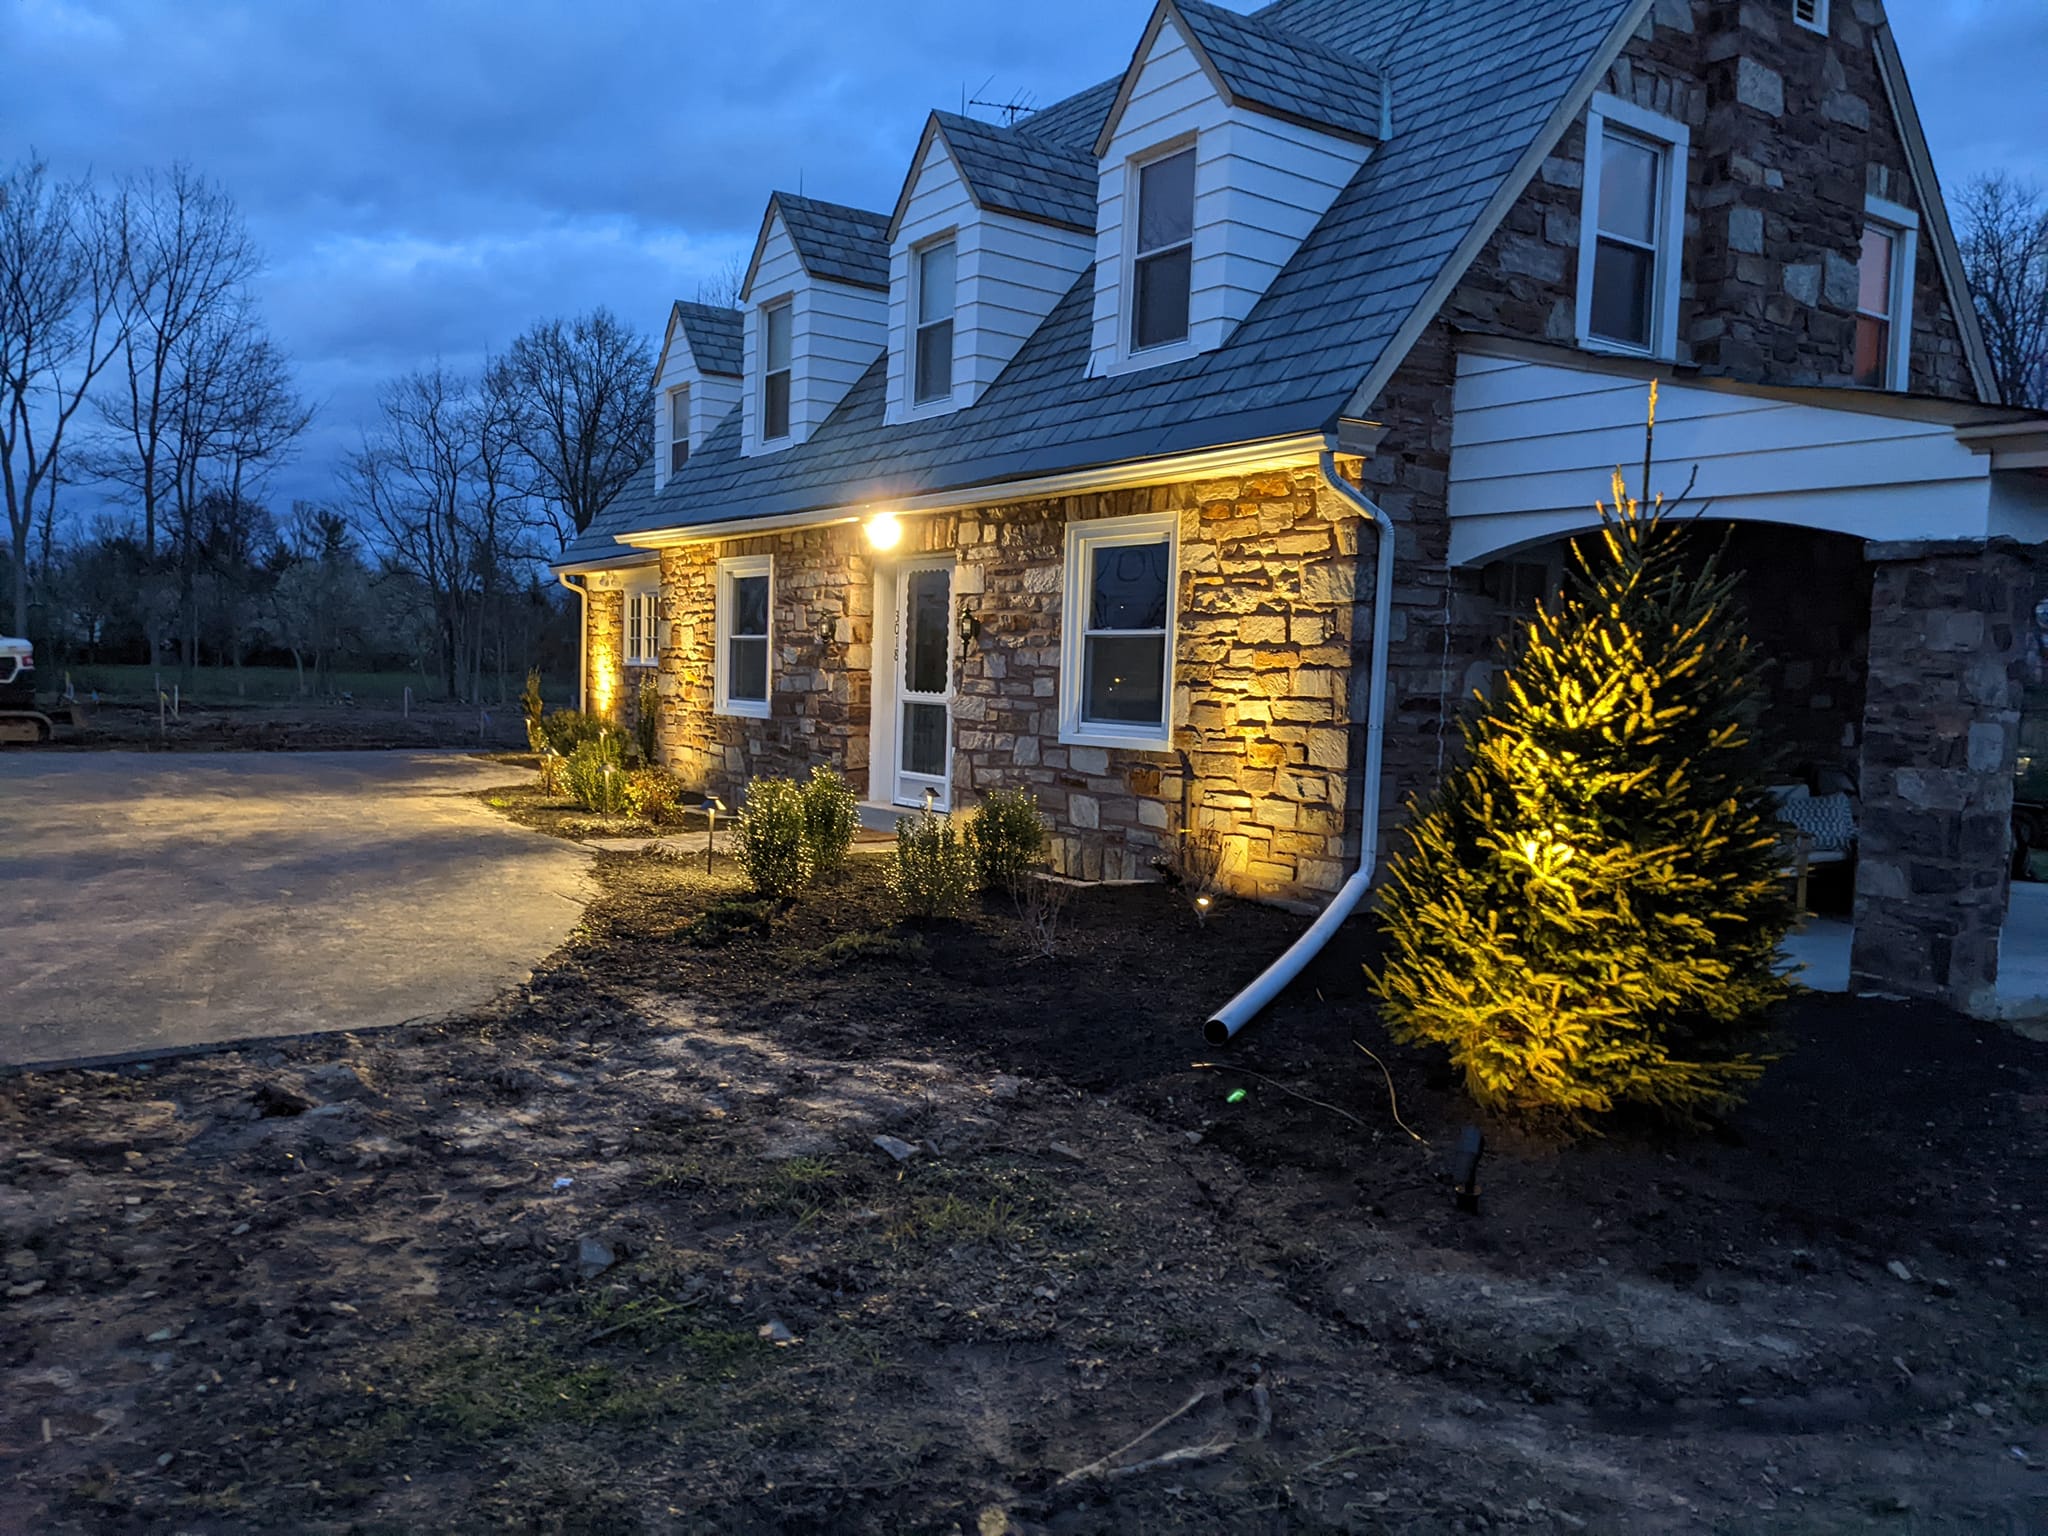
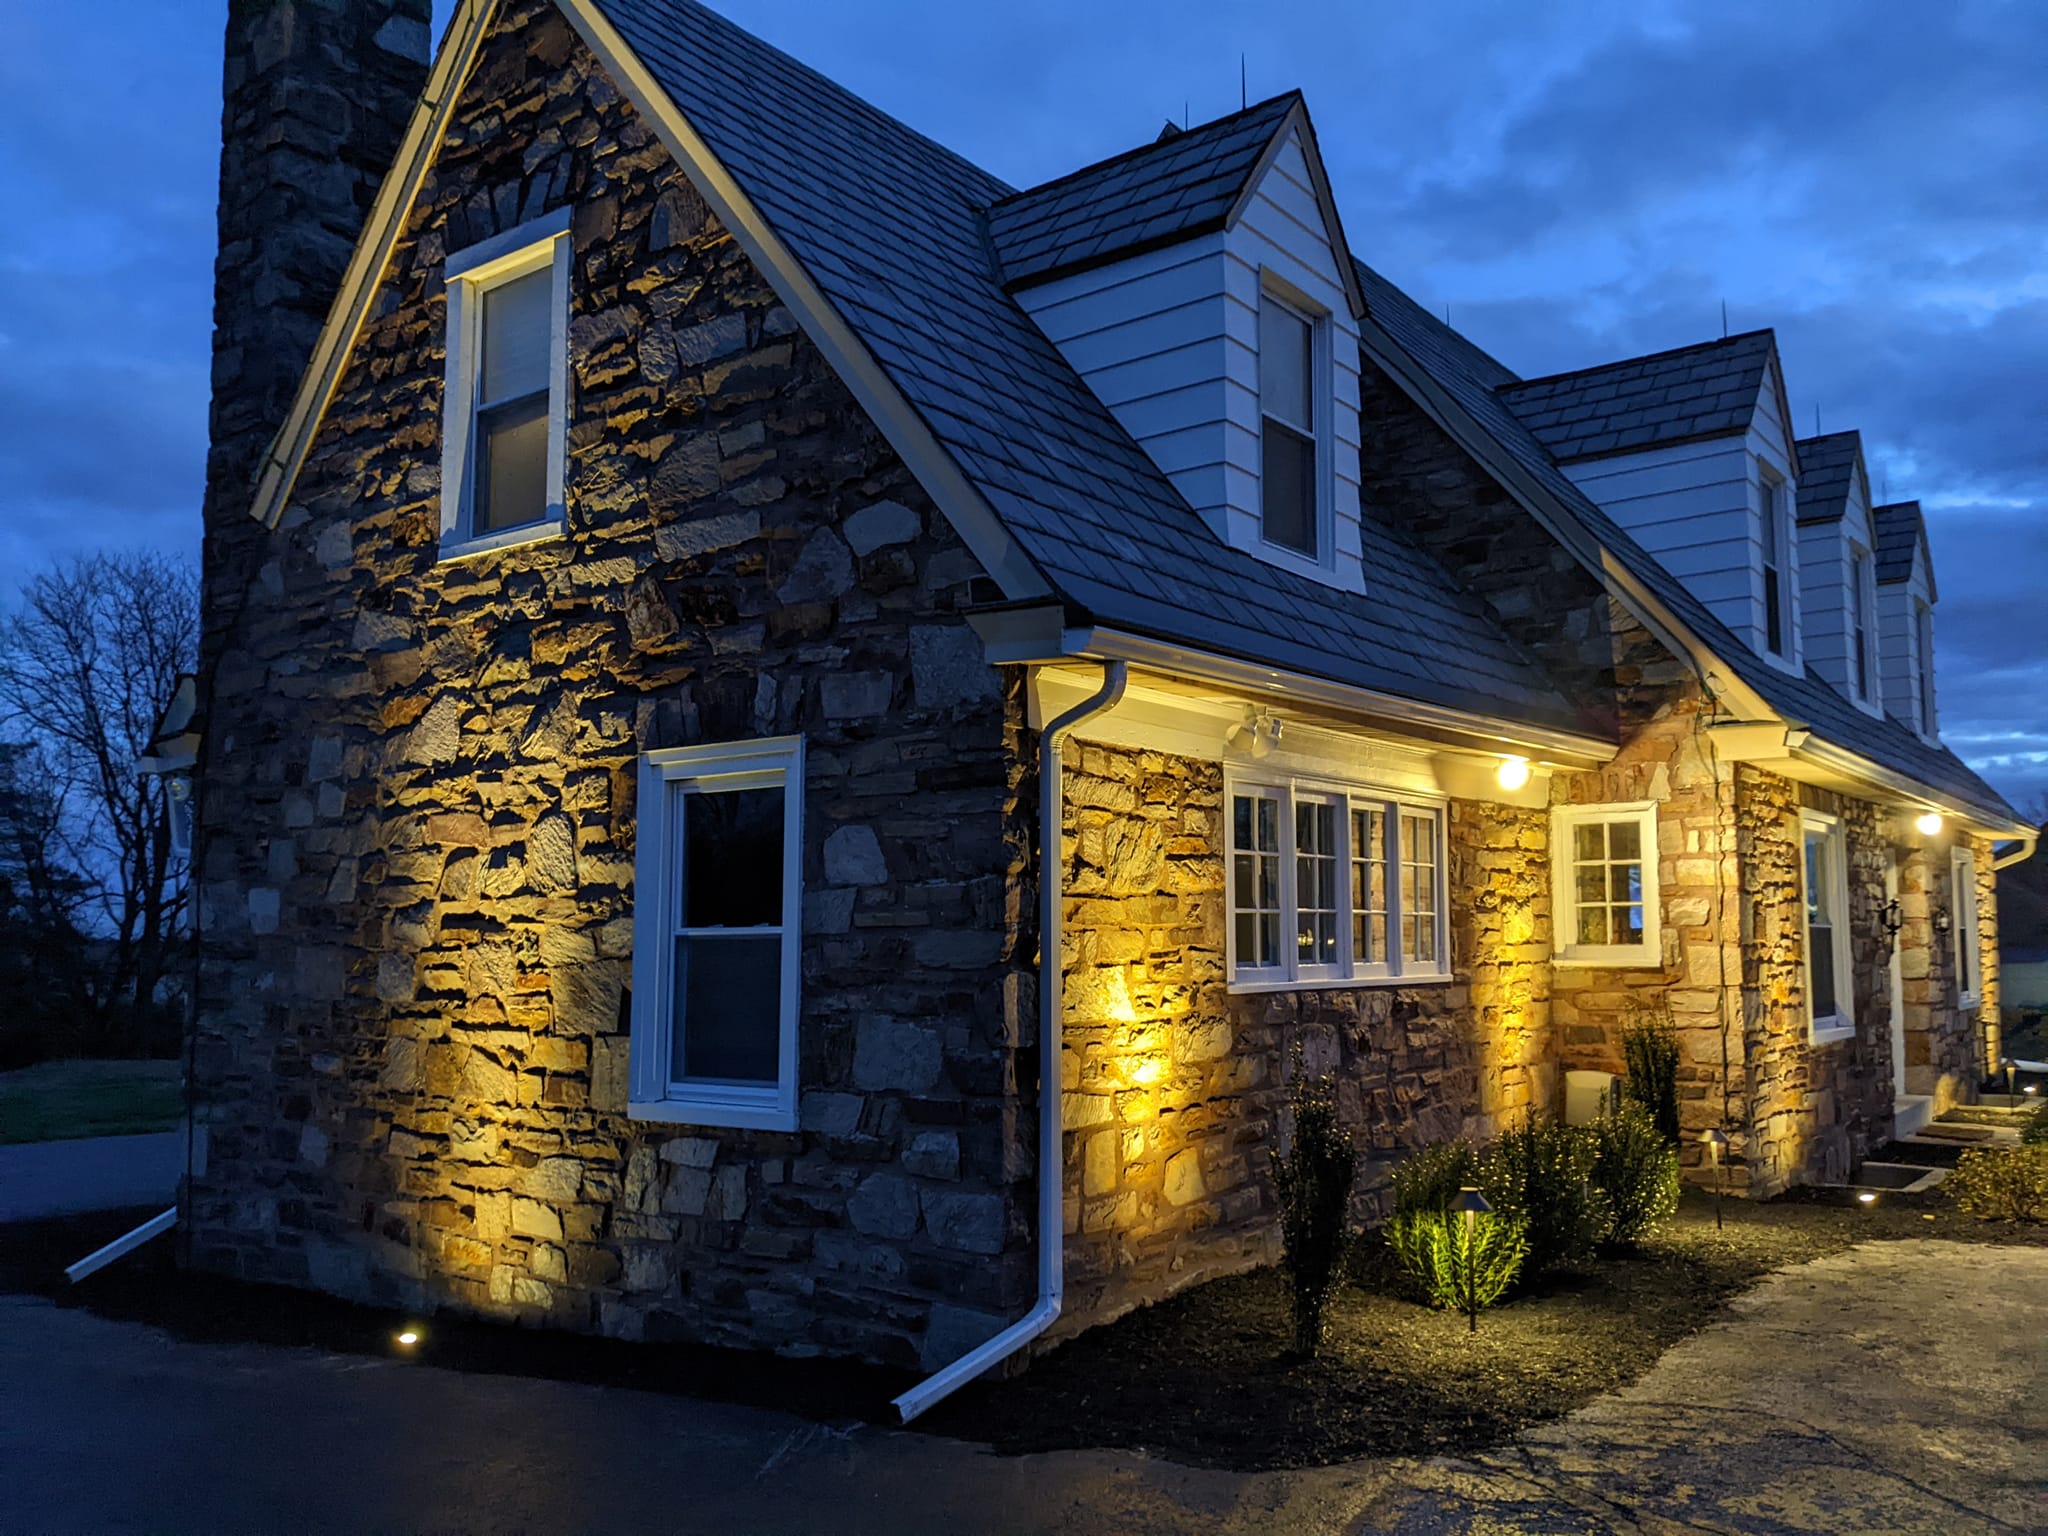
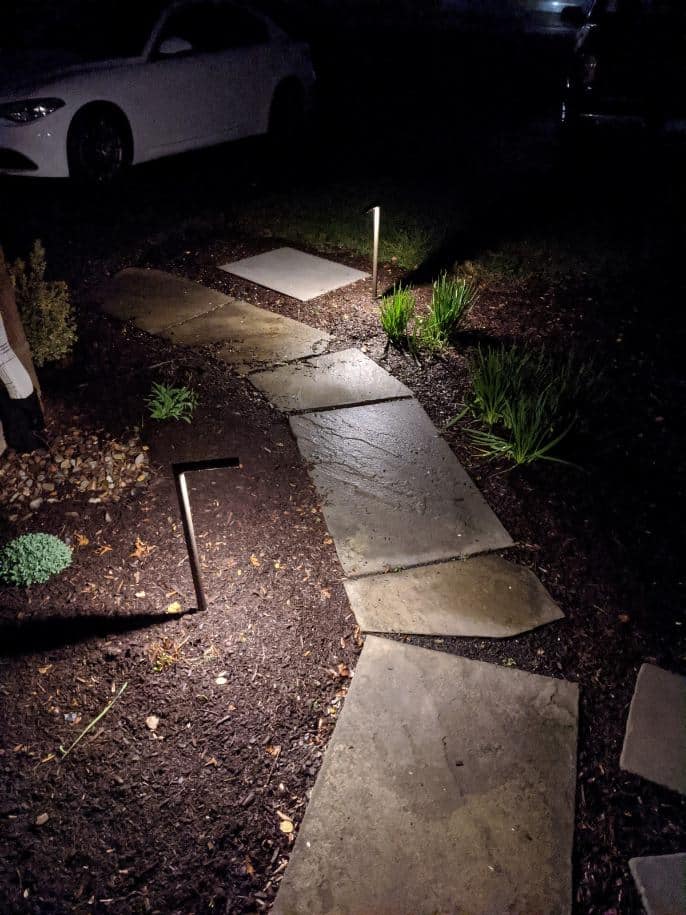
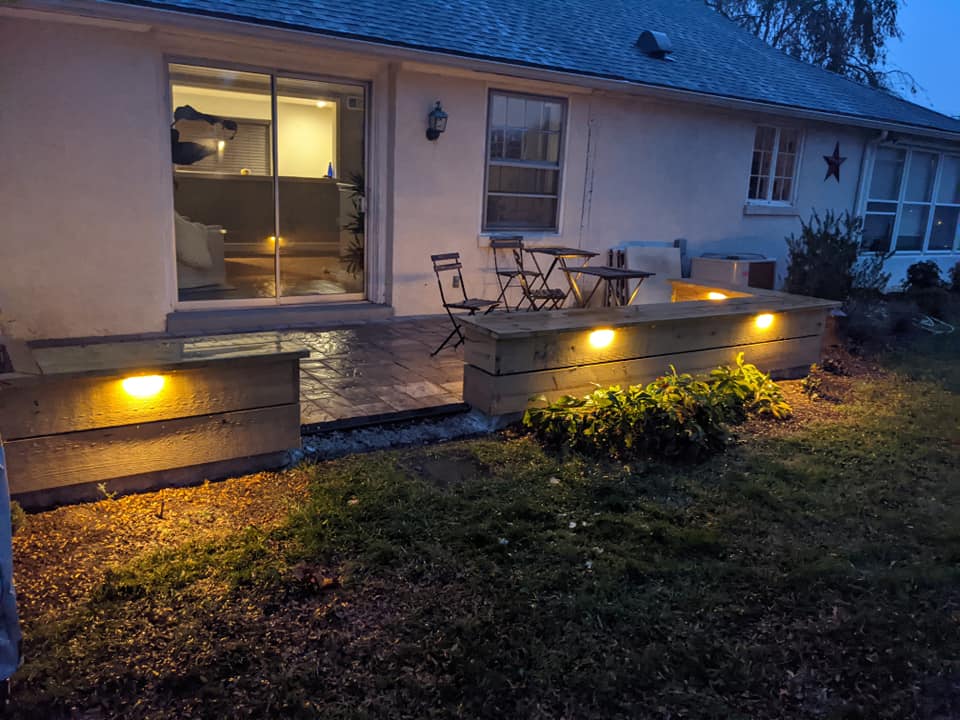
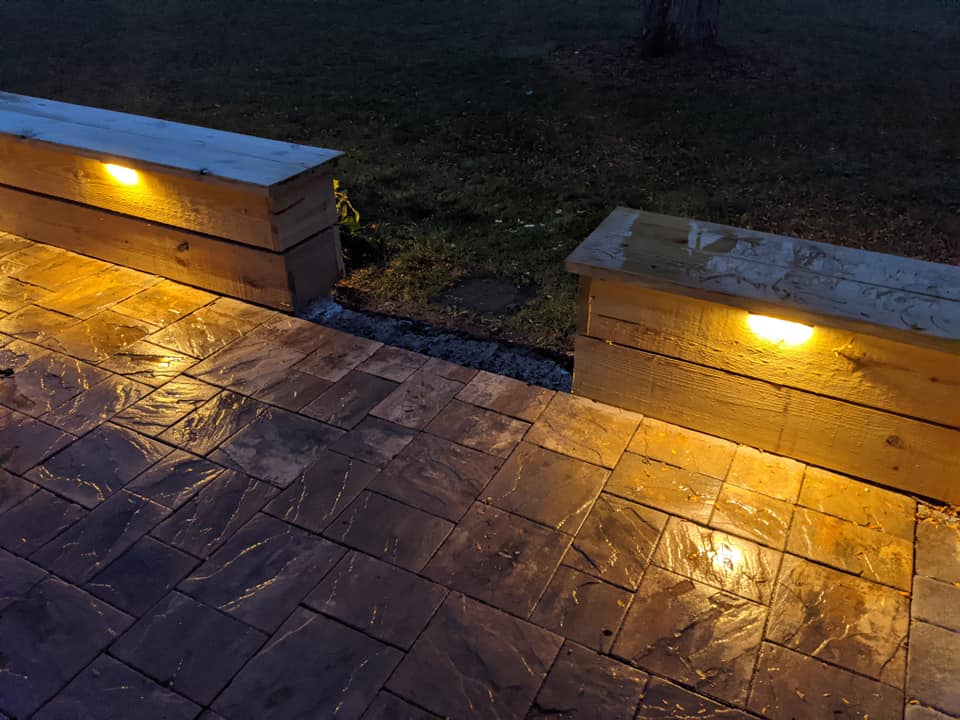
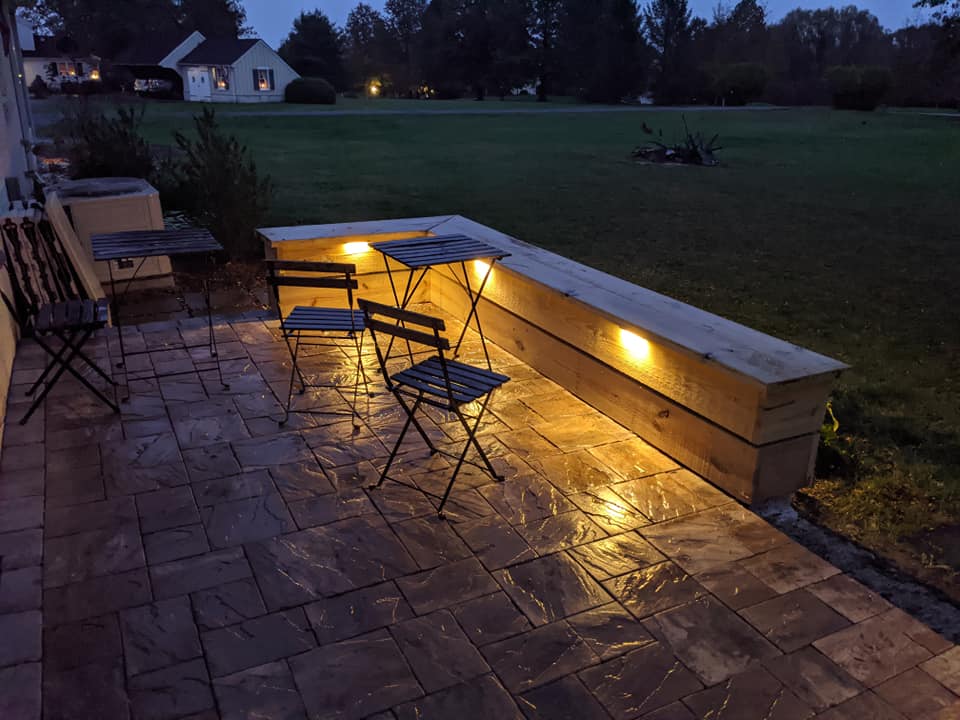
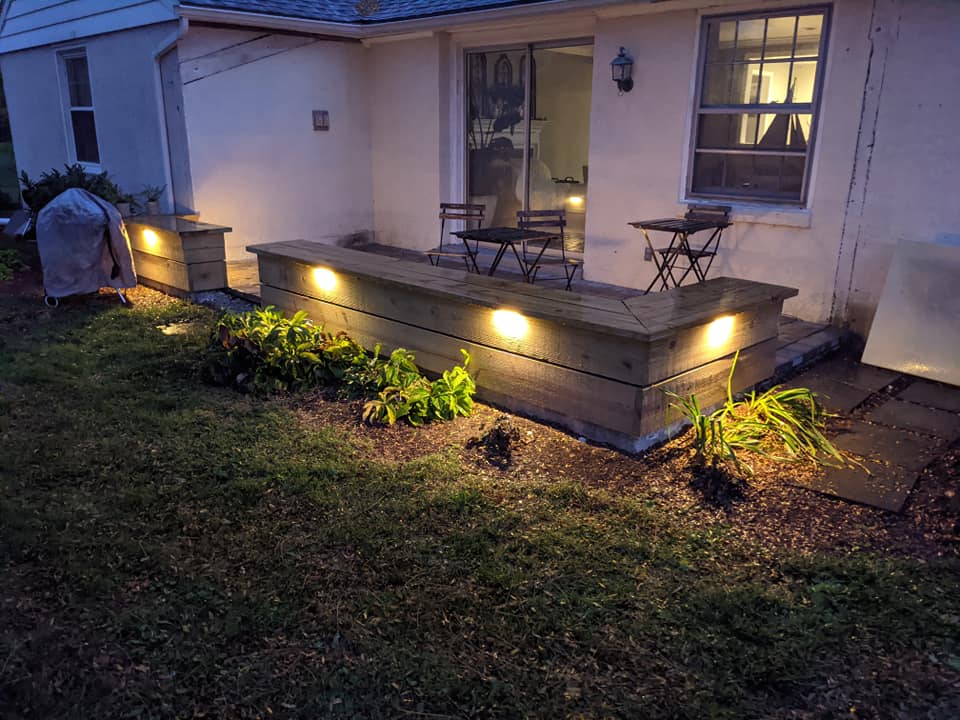
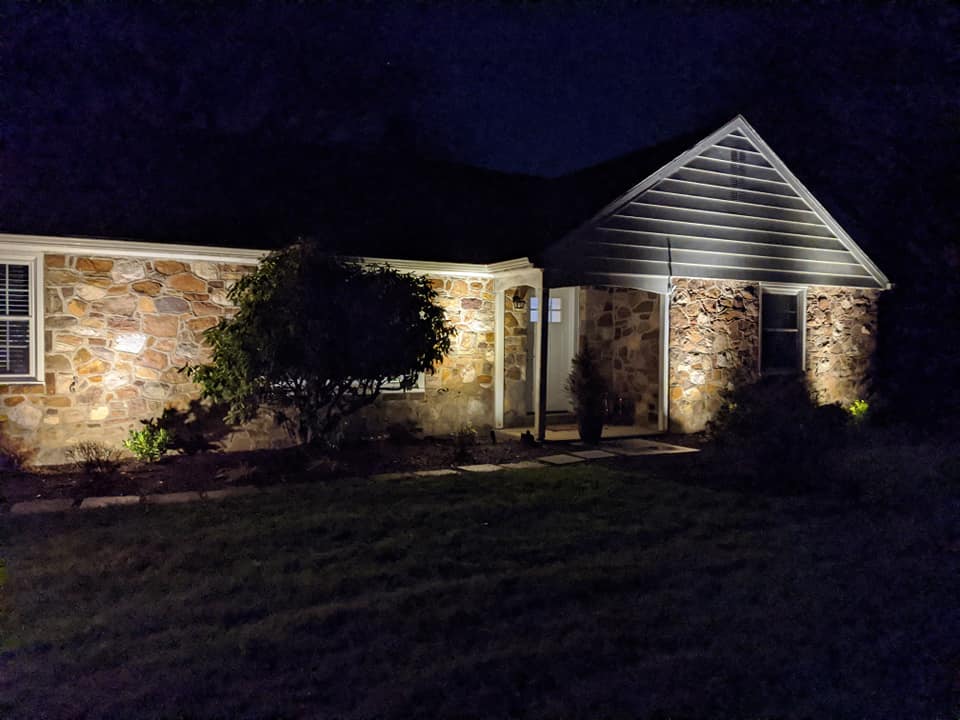
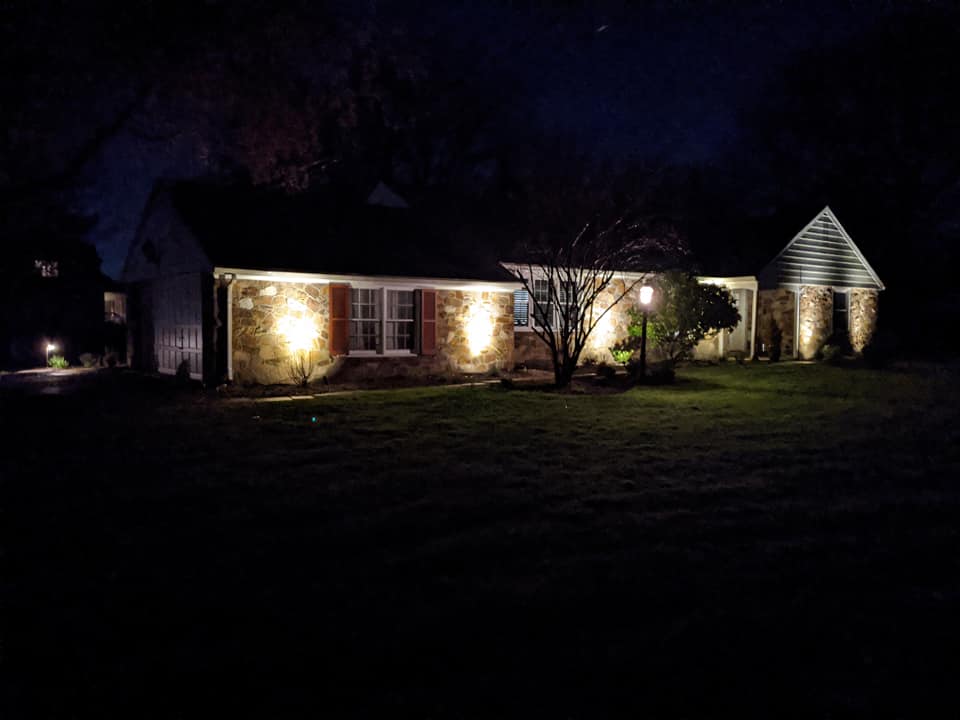
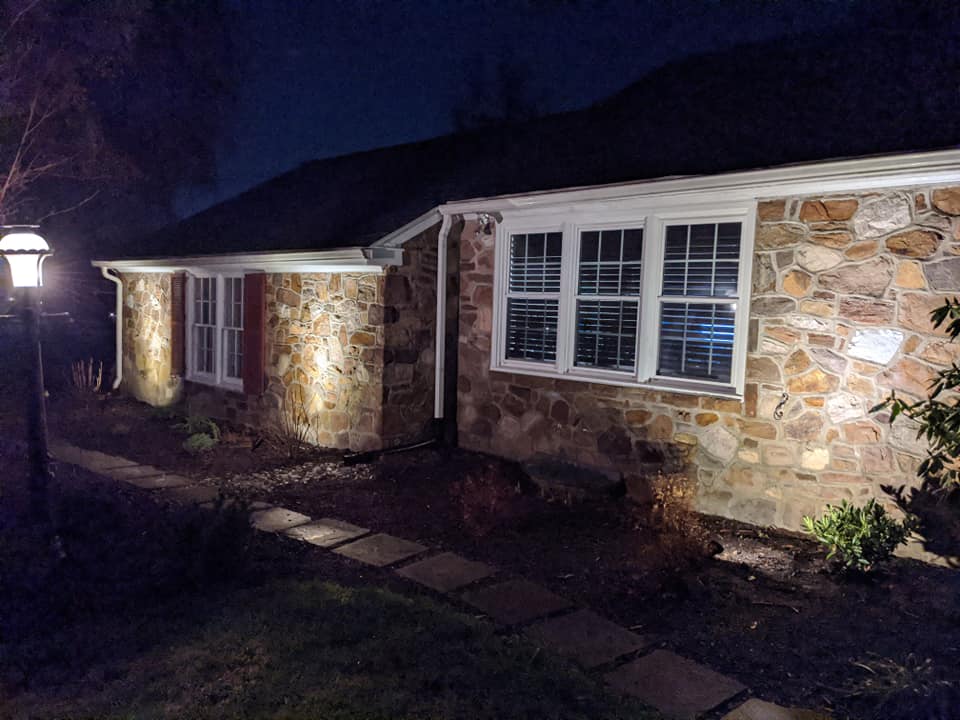
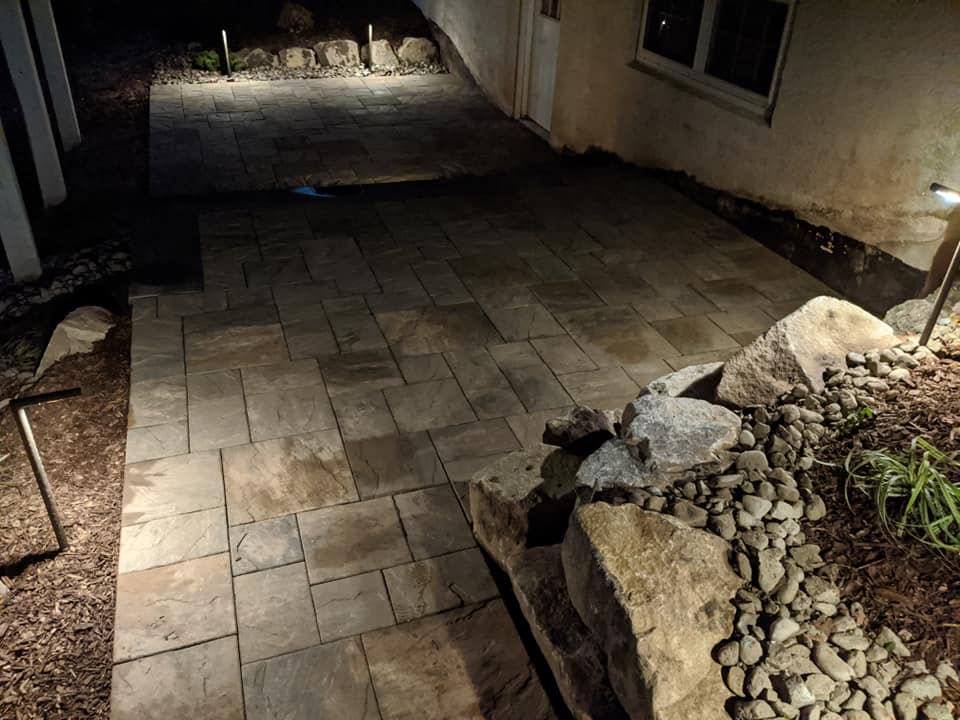
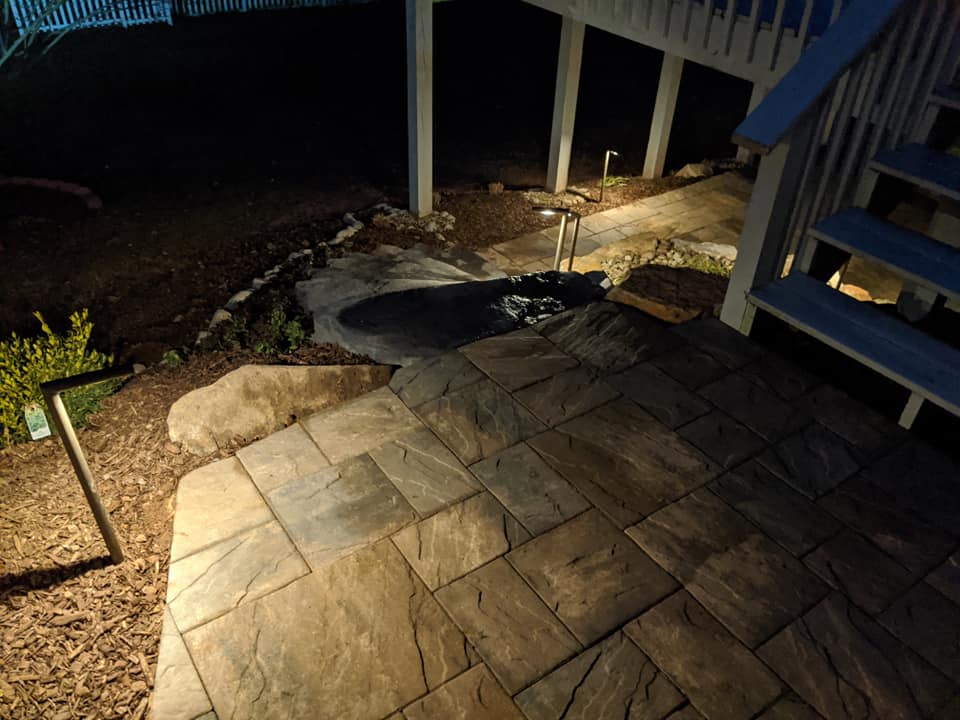
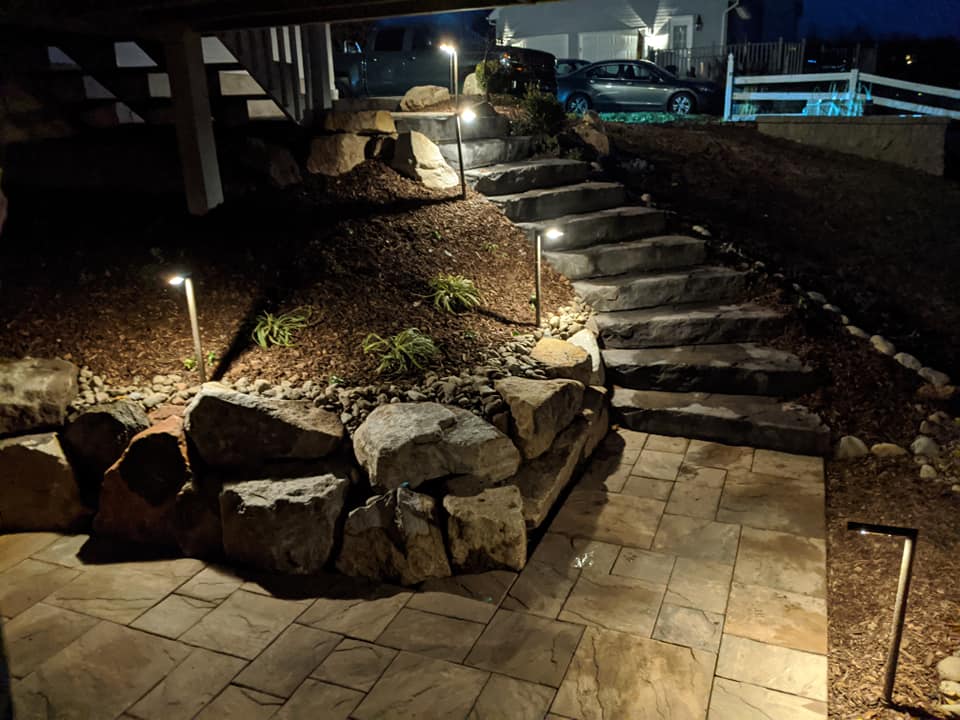
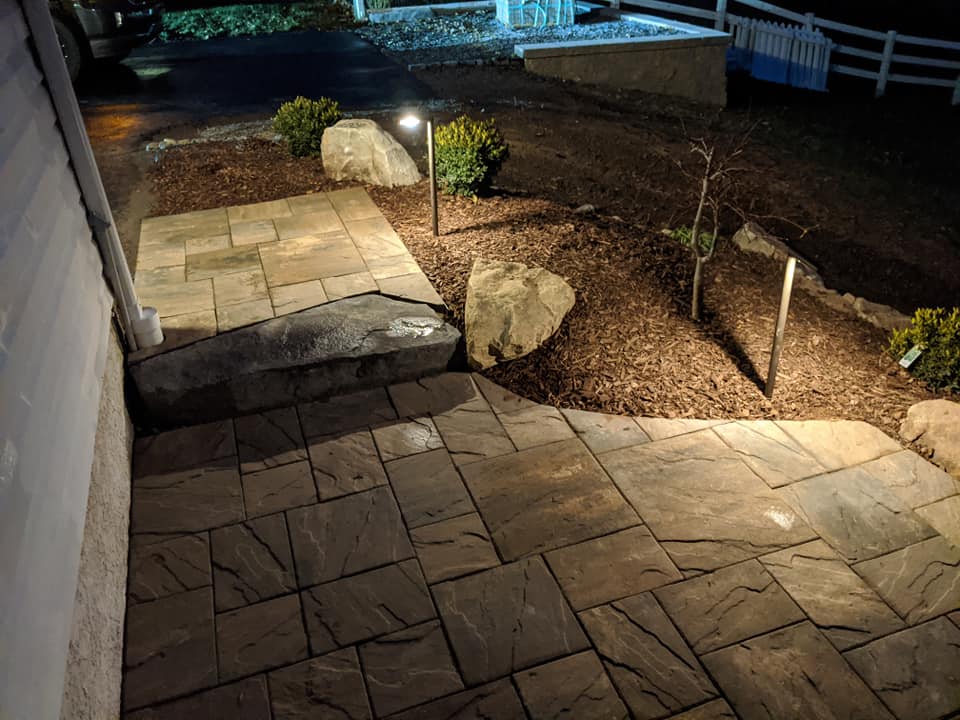
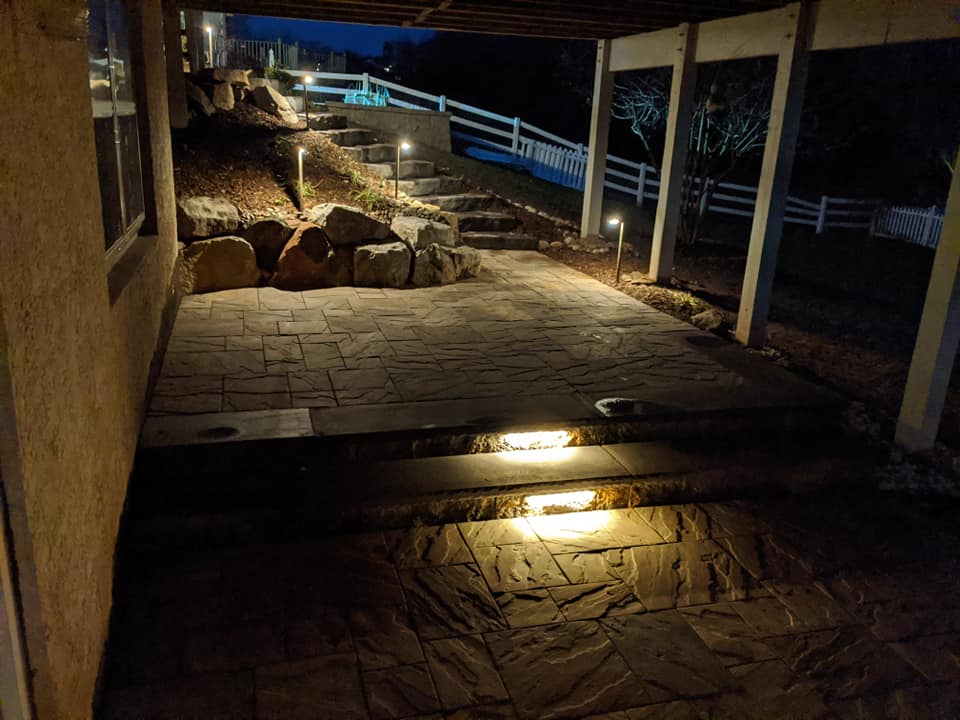
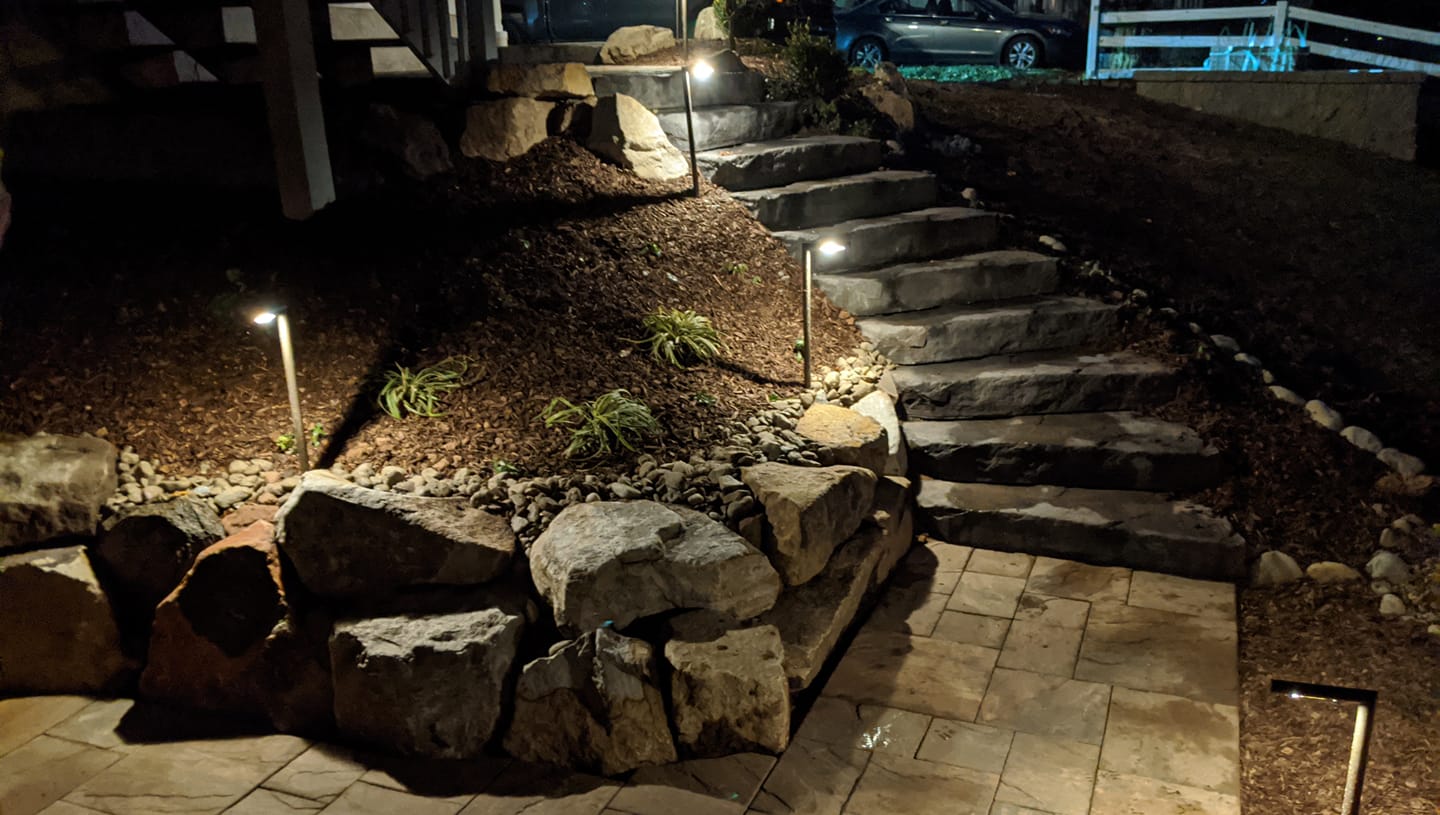
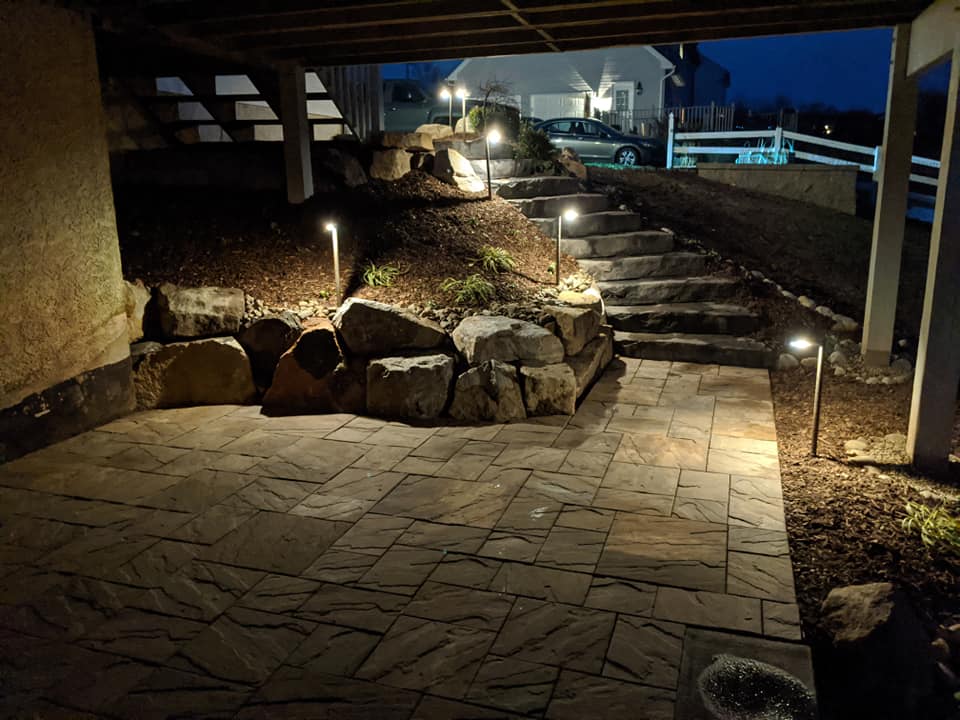
RH Design Concepts can install low voltage LED lighting on your property. Whether it is to add to your entire project, or to make a a solo installation on your property—outdoor lighting ties everything together. It also creates a multi functional and usable space at night, while also providing visibility, safety, and protection. We install a low voltage LED transformer at your accessible outlet and run our necessary wiring and connections from there. This eliminates using separate breakers. Fixtures are often high quality brass or economy models in aluminum offering various options. We install lights on pillars, well lights on homes, accent / up lights on plant material, and path lights along your walkway. Let our team begin helping you and contact us about the installation of your pond / aquatics project!
LED Lighting systems are essential to making your outdoor space look amazing. All of our LED Lighting systems can certainly make a great impression. Our specialty is making sure the project turns out as you intended. RH Design Concepts is dedicated to going above and beyond to ensure the correct installation methods and safety precautions are taken. Talk to our team today and learn more.


Request A Free Consultation
Complete the form below and we will schedule a time to discuss your project.
About this process
LED Lighting installations can be exciting and rewarding projects that can enhance the visual appeal, aesthetics, and value of your home. With the right planning and execution of each stage of your LED Lighting installation we also customize the project with your vision and selection. Whether you’re updating a few outdoor elements or completely transforming your outdoor space, thoughtful design, quality materials, and skilled craftsmanship are key to achieving successful results. Here’s a basic guide to our process:
We always aim to exceed expectations—at every project
- Understanding the full scope of work is crucial to correct installation
- From preparation to finish with placement—we aim to get it right
- Our team has the expertise to get the project completed successfully

Call For a Quote:
267•733•3831
UNDERSTANDING THE SCOPE OF WORK
LED LIGHTING INSTALLATIONS
By carefully planning and executing each stage of your LED Lighting instllations you can create a beautiful, functional, and comfortable space that meets your needs and reflects your personal style. Installing LED lighting involves several steps, from planning and preparation to installation and testing. Here’s a detailed breakdown of the process:
1. Planning and Design
- Assessment:
- Purpose: Determine the purpose of the LED lighting, whether it’s for general illumination, task lighting, accent lighting, or security.
- Location: Identify the locations where lights will be installed, such as in ceilings, walls, under cabinets, or outdoors.
- Design:
- Lighting Plan: Create a lighting layout that specifies the type, placement, and spacing of the LED fixtures. Consider factors like light intensity, color temperature, and beam angle.
- Wiring and Controls: Plan the wiring layout and decide if you will use dimmers, smart controls, or timers. Ensure that the electrical system can support the new lighting.
- Materials:
- Fixtures: Choose LED fixtures based on your design needs. Options include recessed lights, track lights, wall sconces, or outdoor floodlights.
- Accessories: Select any necessary accessories such as mounting hardware, dimmer switches, and connectors.
- Budgeting:
- Estimate costs for LED fixtures, wiring, controls, and any labor if hiring an electrician. Adjust the design if needed to stay within budget.
2. Preparation
- Tools and Materials:
- Gather necessary tools including a screwdriver, wire stripper, electrical tape, drill, level, and any specific tools required for your fixtures.
- Safety Precautions:
- Power Off: Turn off the power to the circuits where you will be working. Verify that the power is off using a voltage tester.
- Protective Gear: Use protective gear like safety glasses and gloves.
3. Installation
- Fixture Installation:
- Recessed Lighting:
- Cutting Holes: Mark and cut holes in the ceiling for recessed can lights.
- Mounting: Install the recessed cans or housings into the ceiling. Secure them with clips or screws as per the manufacturer’s instructions.
- Wiring: Connect the wiring to the fixtures. Follow the wiring diagram provided with the fixtures.
- Track Lighting:
- Mounting: Install the track on the ceiling or wall using mounting brackets and screws. Ensure it is level and securely attached.
- Connecting: Attach the track’s power supply to the electrical box. Install the LED track heads into the track.
- Wall Sconces and Other Fixtures:
- Mounting: Install mounting brackets or bases on the wall or surface.
- Wiring: Connect the fixture wires to the electrical box. Follow the fixture’s wiring instructions for proper connections.
- Attachment: Secure the fixture to the mounting bracket or base.
- Recessed Lighting:
- Wiring:
- Connections: Connect the fixture wires to the existing wiring in the electrical box using wire nuts. Typically, you will connect the black (hot) wire to the black wire, the white (neutral) wire to the white wire, and the green (ground) wire to the ground wire.
- Securing: Use electrical tape to secure wire nuts and ensure all connections are tight and properly insulated.
- Switches and Controls:
- Install: Install dimmer switches, smart controls, or timers as planned. Follow the manufacturer’s instructions for wiring and installation.
- Programming: If using smart controls, program the settings and schedules according to your preferences.
4. Testing and Adjustments
- Power On:
- Turn the power back on at the circuit breaker. Check each fixture to ensure it is functioning correctly.
- Adjustments:
- Positioning: Adjust the angle or direction of adjustable fixtures or track lights to achieve the desired lighting effect.
- Brightness and Color Temperature: Test dimmers and controls to ensure they work as intended. Adjust brightness levels and color temperatures to meet your needs.
- Check for Issues:
- Look for any flickering, inconsistent lighting, or other issues. Address any problems with wiring or fixtures as needed.
5. Finishing Touches
- Clean Up:
- Remove any debris, dust, or packaging materials from the installation area.
- Clean the fixtures to remove fingerprints or dirt.
- Documentation:
- Keep a record of the installation, including wiring diagrams, fixture types, and control settings for future reference or maintenance.
6. Maintenance
- Regular Checks:
- Periodically inspect LED fixtures for any issues such as flickering or dimming. Ensure that the controls and switches are functioning properly.
- Cleaning:
- Clean fixtures and lenses regularly to maintain optimal light output and appearance. Use a soft, dry cloth or a cleaner recommended by the manufacturer.
- Upgrades:
- Consider upgrading to newer LED technology or adding additional features as needed to improve lighting performance or efficiency.
By following these steps, you can ensure a successful LED lighting installation that enhances the functionality and aesthetics of your space while maintaining energy efficiency.
Our goal is to help you!
We’re dedicated to getting your lighting project right.

F.A.Q.
There are many different details that surround hardscaping. Our team is always happy to help you learn more about your project.
What are the benefits of LED lighting?
Benefits include energy efficiency (lower electricity consumption), long lifespan (up to 50,000 hours or more), lower heat emission, and reduced maintenance costs. LEDs also provide better light quality and are available in a range of color temperatures including RGBCW.
Can LED lights be controlled with smart home systems?
Yes, many LED lights can be integrated with smart home systems and controlled via apps, voice commands, or remote controls. Smart LED bulbs often include features like color-changing options and scheduling.
Do LED lights work in cold or hot environments?
LEDs generally perform well in a wide range of temperatures. However, extreme cold or heat can affect their efficiency and lifespan. Ensure that LEDs are rated for the environment in which they will be used.
Are LED lights environmentally friendly?
LEDs are more environmentally friendly than traditional lighting due to their energy efficiency and longer lifespan. They also contain no hazardous materials like mercury, which is found in some fluorescent lights.
How do I clean LED lights?
Turn off the power before cleaning. Use a dry or slightly damp cloth to wipe the surface. Avoid using harsh chemicals or abrasive materials that can damage the LED or its covering.
Contact Us
Always feel free to contact us about any questions you have, to setup a free consultation, or just to say hello!
Popular Services
267.733.3831